This is going to be a quick one as I'm actually with my family now, but--
When packaging a model to mail, I think one of the most important things is to make sure there is enough packing material to fill the box. I use packing peanuts (I bought 120 cubic feet of them at once, that's a LOT of packing peanuts) and bubble wrap over toilet paper. I wrap ears and other protruding parts with the tissue. I wrap around the dock, for instance, in a way that will provide support rather than adding to the stress on the piece. Then a good layer of bubble wrap, then into a box big enough to have at least 2-3" of room all the way around the bubble wrapped horse. More space is better, but you don't want the box to be so big that you need a fortune in packing peanuts to fill it.
I put a good 2" or more of peanuts in the box, then put in the bubble wrapped horse, then fill the box with peanuts, tucking them in around the sides of the horse. When you close the box, before taping the top pick it up and shake it gently. If there is any shifting at all, you need more peanuts. Shifting is a danger sign--it means you model will be able to work its way to the edge of the box and get broken. So use lots of packing material so there is no danger of shifting. I tend to fill the box to slightly over the edge, then gently push the peanuts down when I close the box. You don't want there to be so much pressure on the horse that it is in danger of breaking, but you don't want it to move around either!
Wednesday, December 22, 2010
Monday, December 20, 2010
Microfiber Towels
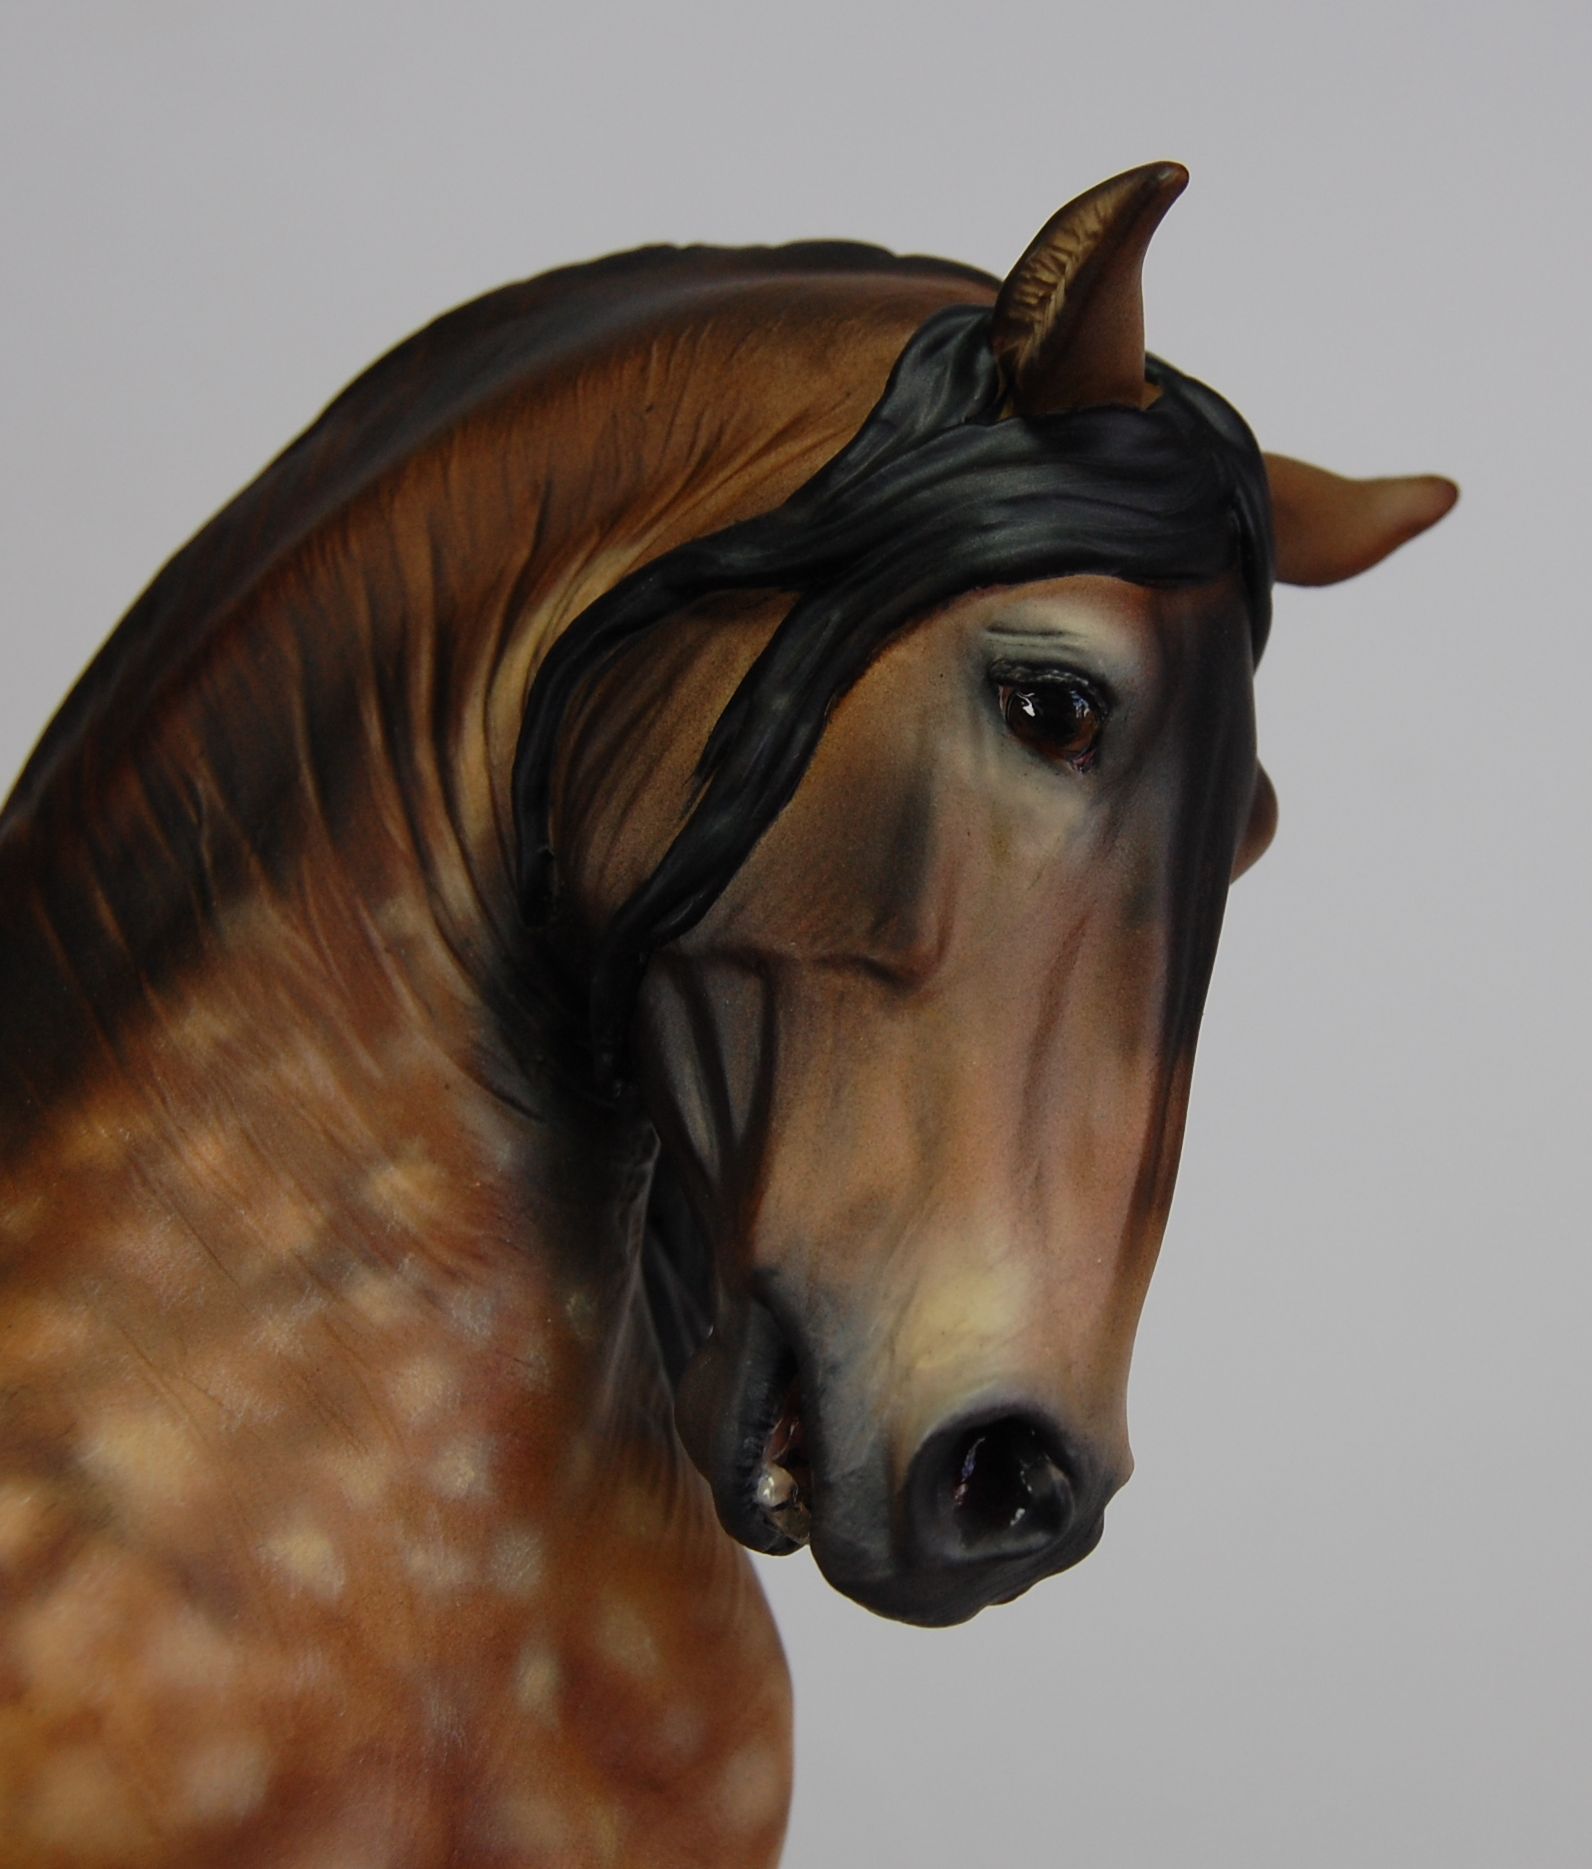
Above: "Almanzor" resin, sculpted by Brigitte Eberl, finished by me. Private collection.
Continuing on the subject of useful things in the studio, I love microfiber towels. I get a big bag of the yellow ones from Costco every so often as they're useful in the studio as well as around the house. Mine generally start off being used to gently dust horses. My studio tends to be more than a little dusty, and that can be a problem when painting. I carefully remove dust and fuzzies from each horse using a microfiber towel before spraying the horse with Dull Cote.
The microfiber holds dust and dirt in, so it's not as likely to just spread the dust around as other towels will. And it's nice and soft, so it doesn't tend to scratch that delicate finishwork before sealing.
When I need to lay horses down, I'll often put down a microfiber towel to protect them from hard surfaces. I'm currently painting a group of 60 small-scale horses (larger than micro mini, smaller than stablemate), and I have found it useful to lay half of them down on a towel on a tray, lay another towel over them, and then lay the other half on top. Saves me a few trips up and down the stairs to spray all these little horses!
I also wrap horses in towels when transporting them to shows. It protects the paint and adds just a little bit of cushioning. And, if I happen to spill something either at a show or in the studio, I always have a towel handy! They're washable, though I try to wash all microfiber together to stop it picking up lint from other fabrics.
Friday, December 17, 2010
Apoxie Sculpt and Rubbing Alcohol
I mentioned mixing Apoxie Sculpt (AS) and rubbing alcohol yesterday. This is a technique that I use at the very end of finishing a piece to add texture and veining. It's a bit difficult to convince AS to mix smoothly with a liquid, so this takes a bit of patience. I know Aves makes other variants on AS and one of them may be a liquid or paste that would work well for this, but I just use AS. I'm going to call my mixture a paste, though it's often more of a thick liquid.
I mix up a small batch of AS as usual. I then put it in one of my handy lids, ideally a fairly large one with decent sides. I then add some denatured alcohol, with the amount depending on how thick I want my paste and how much AS I have. Better to start with a bit less and add more later, but it does evaporate fairly quickly. Then comes the hard part: I use my gloved fingers to mash the AS into the alcohol. It takes a lot of mashing and squishing and rubbing, and it's important to get it as smooth as possible. Any lumps will be quite annoying when you go to use the paste.
The paste needs to be used immediately. It will dry out and the AS will begin curing, so I make sure I have a good hour or two set aside to use it before I begin making it.
I brush the paste on to areas where I want fine wrinkles, use it to paint on delicate veins, texture hair with it--anything that needs a very delicate bit of texture. I use brushes set aside specifically for this. Even though the AS paste does wash out I don't want to destroy my good brushes with it.
You can further smooth the mixture using additional alcohol, just as you can smooth any AS with alcohol. It will get grainy if overworked, and if that happens sometimes it's best to just wipe it off and start over.
Since this technique is for the surface detailing, make sure that everything else is finished before you do it--it should be the very last step before priming and painting.
Thursday, December 16, 2010
Recycling

In my last post I showed a horse standing on a lid. Here he is again--his little legs are pretty rough still!
I save most of the lids that come on food containers here, run them through the dishwasher, and use them in the studio. There are lots of potential uses: a palette for small amounts of paint, a mixing tray for squashing together Apoxie Sculpt and rubbing alcohol to make a paste, bases for horses like Cooper who need something to stand on while being painted, and temporary holders for small sculptures like this one. I'll also put a bit of baking soda in one so it's easier to dip parts into when doing the soda-glue method with super glue. When they get dirty it's easy to just toss them, since it's what would have happened to them anyhow!
Wednesday, December 15, 2010
Sculpting Lights
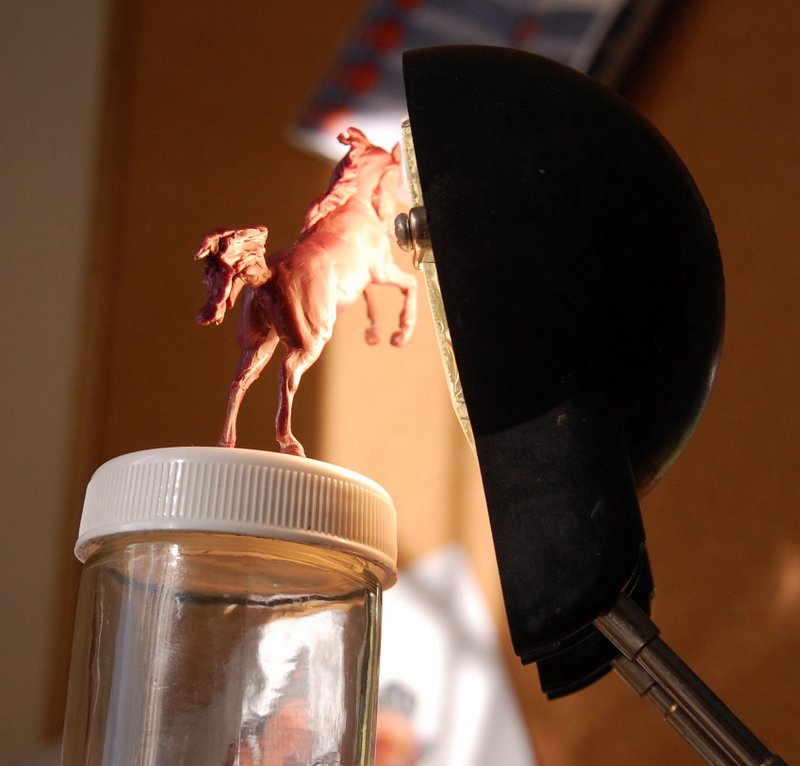
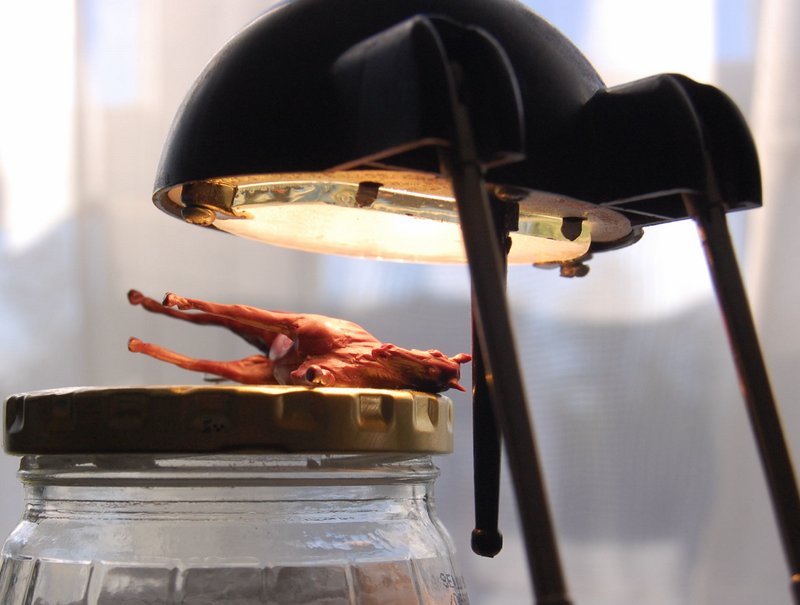
In this case both the horses I am sculpting on today are under the lamps right now. The Arab on top has his leg wires jammed through a pair of holes in a lid (which doesn't actually quite fit that jar) so he can stand until I make him a base. Note that this lamp is missing the plastic rod that the other one has--that's actually nice, as it means I can position the lamp in more ways. The PRE sculpture below him is laid down so I don't knock him over again!
These lights can get quite hot so it's important not to get them too close to the sculpture. It's especially important when working on customs as the plastic will melt or deform at a much lower temperature than Apoxy Sculpt can stand. I will put my lights as close as 1/2" for small sculptures like these but no closer than about 1 1/2" for a custom. It is possible to burn epoxy too, so keep an eye on things! And remember, the pieces will be quite hot after being under that light, so be careful!
Tuesday, December 14, 2010
Sanding Twigs

I just received a container of these sanding twigs (link should be to their page on Micro-Mark, a good supplier of small tools) and they are very handy! They come in an assortment of grits, color-coded by coarseness. The finer ones have four different grits on each twig. These had been recommended to me by someone--Lesli?--and I had put off getting them because sandpaper seemed cheaper.
I wish I had gotten them much earlier! They work wonderfully for removing seams on pewter horses, and I'm sure they will work just as well on resin and plastic. It's much easier to use a twig than my normal folded bit of sandpaper for getting between legs and other difficult to reach areas. If you do a lot of prepping, give them a try.
Friday, November 26, 2010
Micro Minis!
I hope everyone had a wonderful Thanksgiving (or for those who don't feel the need to spend a day stuffing themselves with turkey and stuffing and mashed potatoes and pie and..., a nice week)! Mine was full of family and friends and food, and so was today. Good times.
I don't know that I posted about them here, but the micro minis that I sculpt are currently available through my website at http://maggiebennett.com/micropage.htm . They're all in stock now and ship usually within a day or two, so they can generally make it to locations in the USA within a week or so. That means that if you're looking for some reasonably priced artist's resins (even though they're pewter I do consider them ARs) for gifts or for yourself please consider them--they look great painted or in their unpainted pewter state! And there are some fun new-ish sculpts up there.
I've been working on a project that involves slightly larger than micro mini scale horses--these guys are closer to 2" instead of the 1-1.5" of the micros. And I really like the scale--it's enough bigger to fit in lots more detail, but small enough to still be pretty affordable and to cast in pewter. The finished pieces are a blast to paint and have a wonderful weight to them. So I'm planning to sculpt a few to be released when I finish them. I hope to paint a small run of them as well, possibly as a pseudo-OF edition. I just have to find some time to work on them in between the other work I'm doing!
Thursday, October 28, 2010
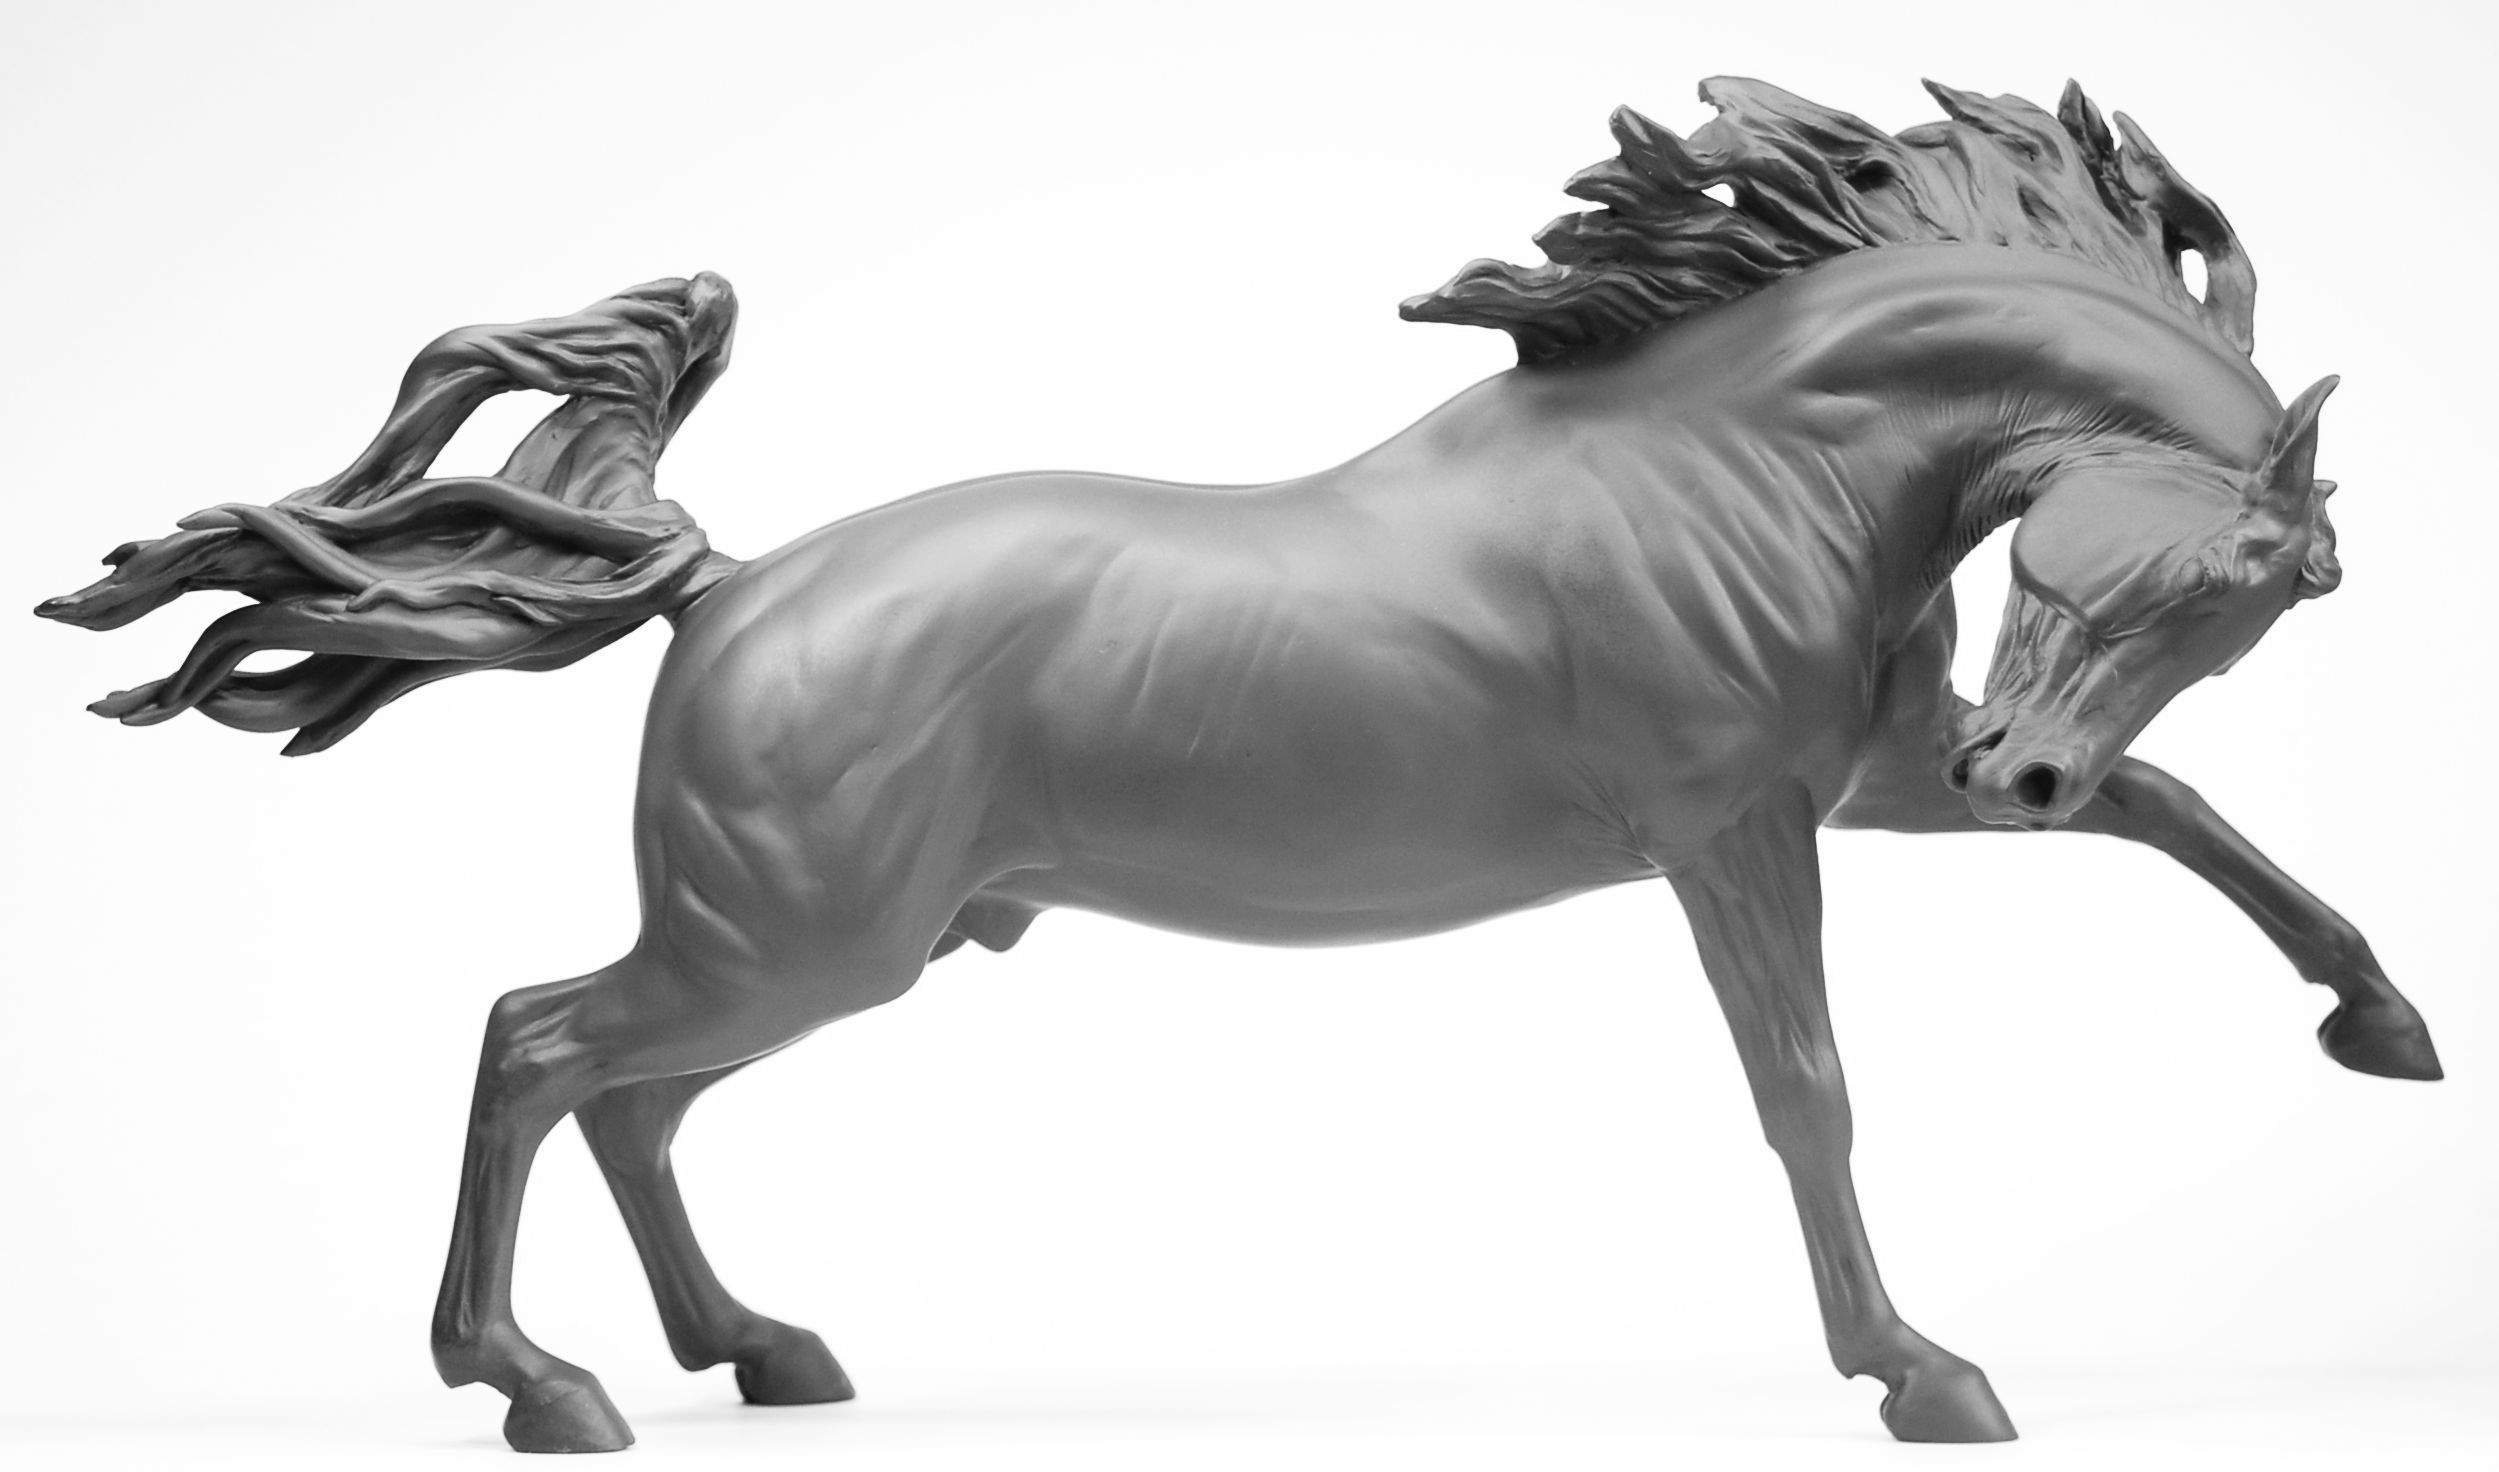
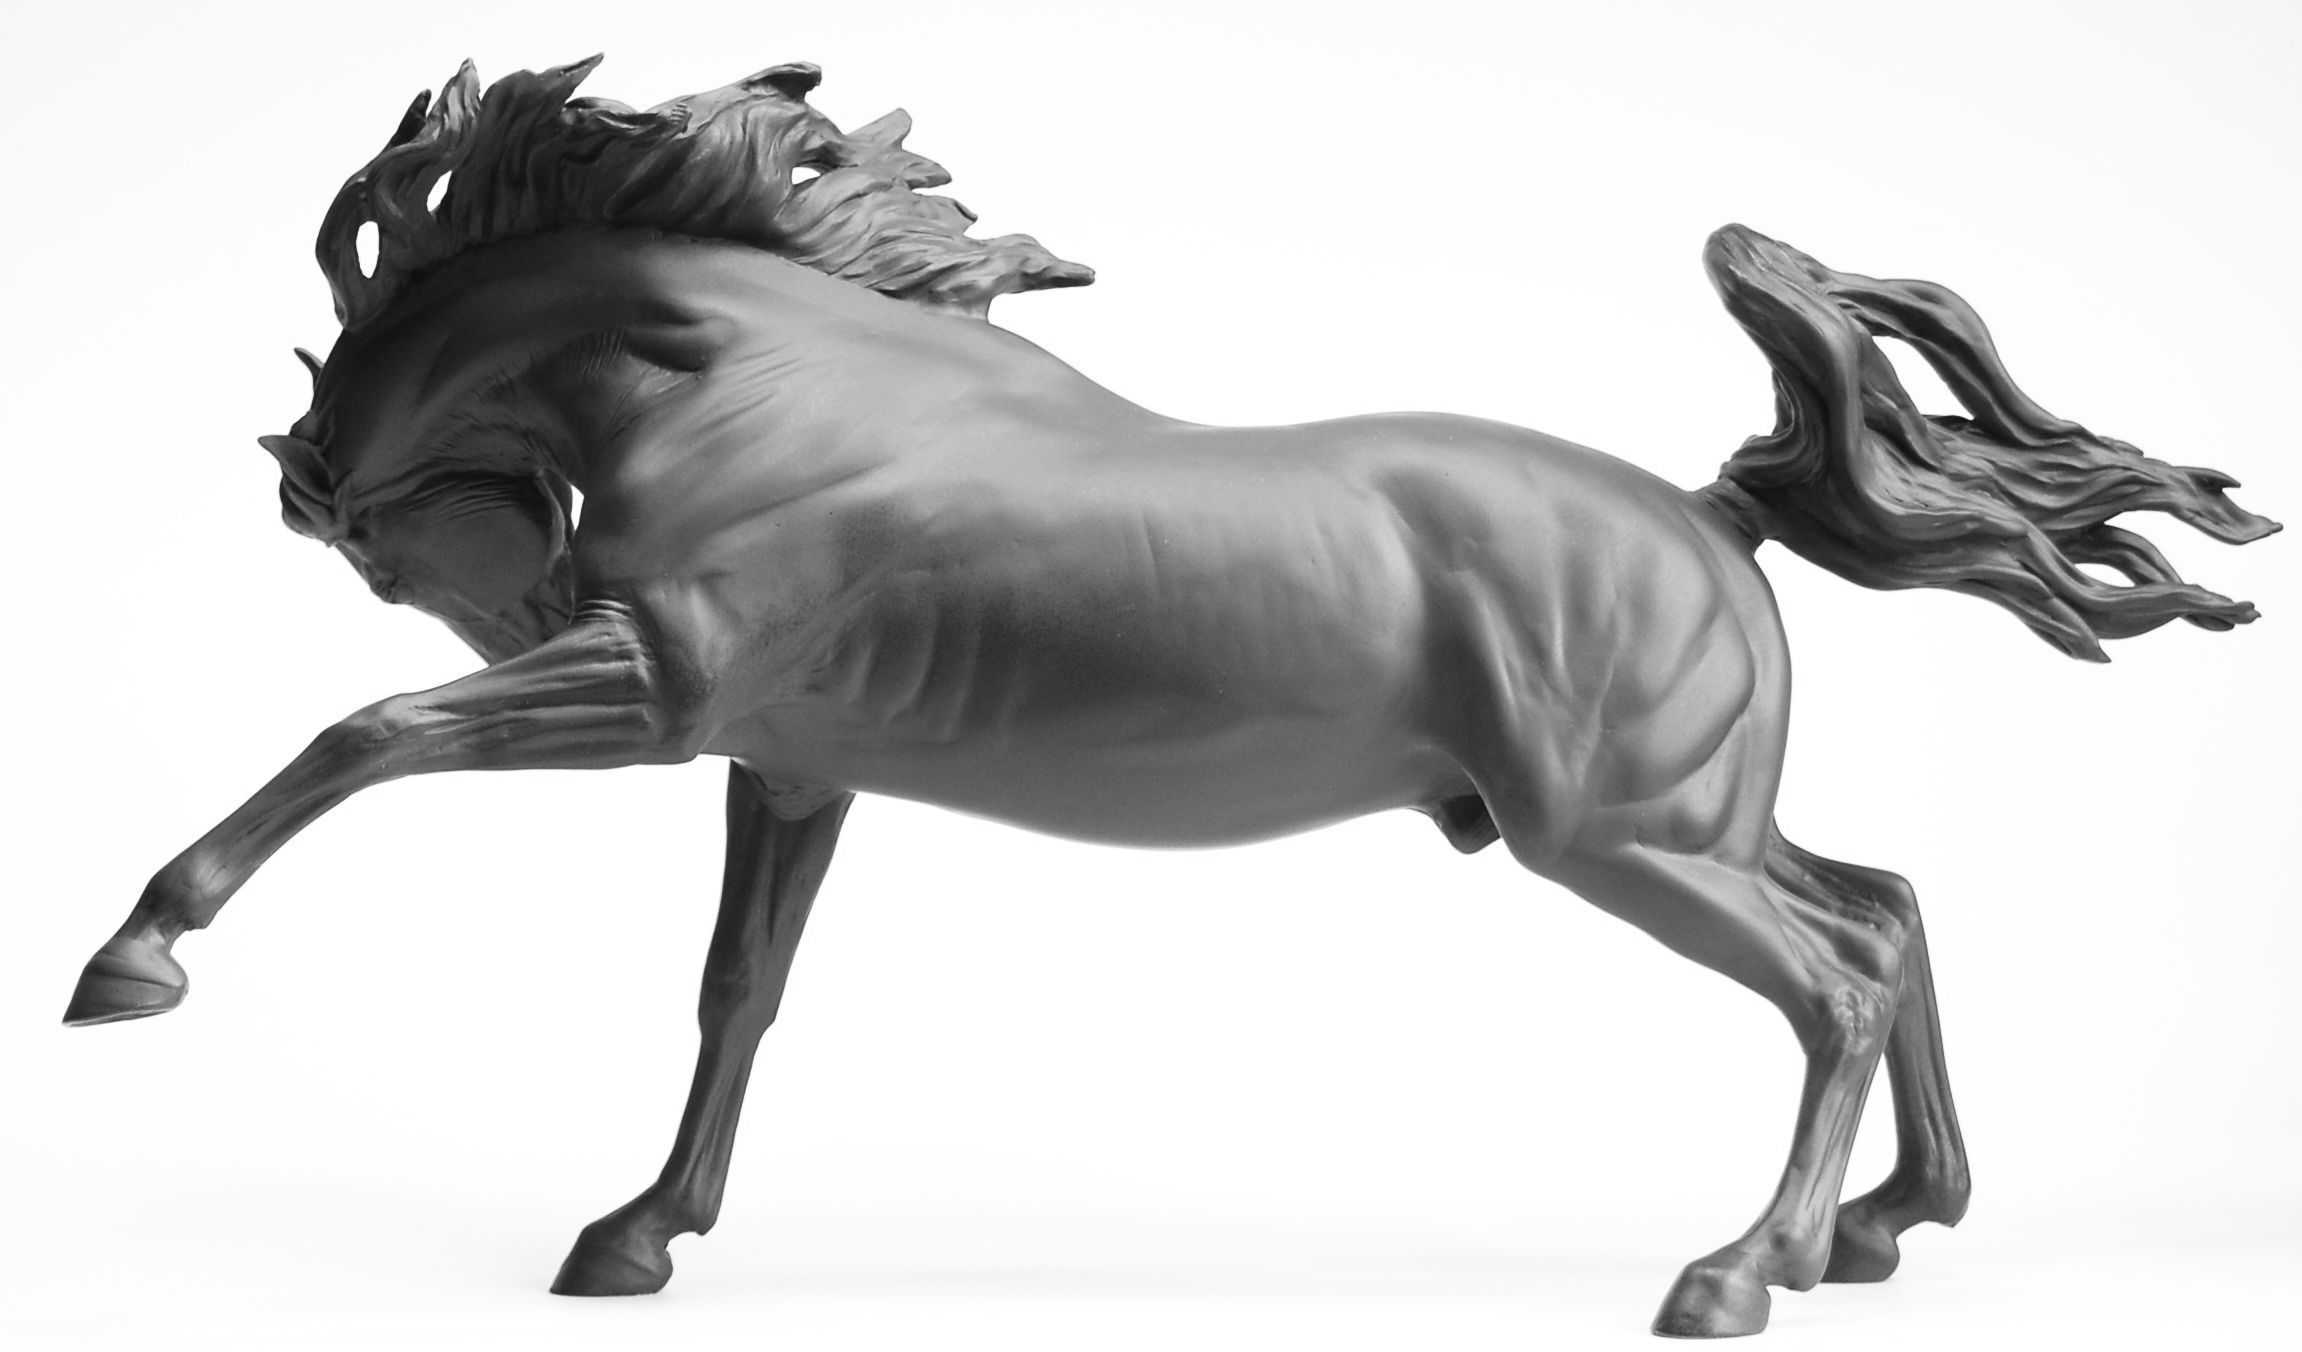
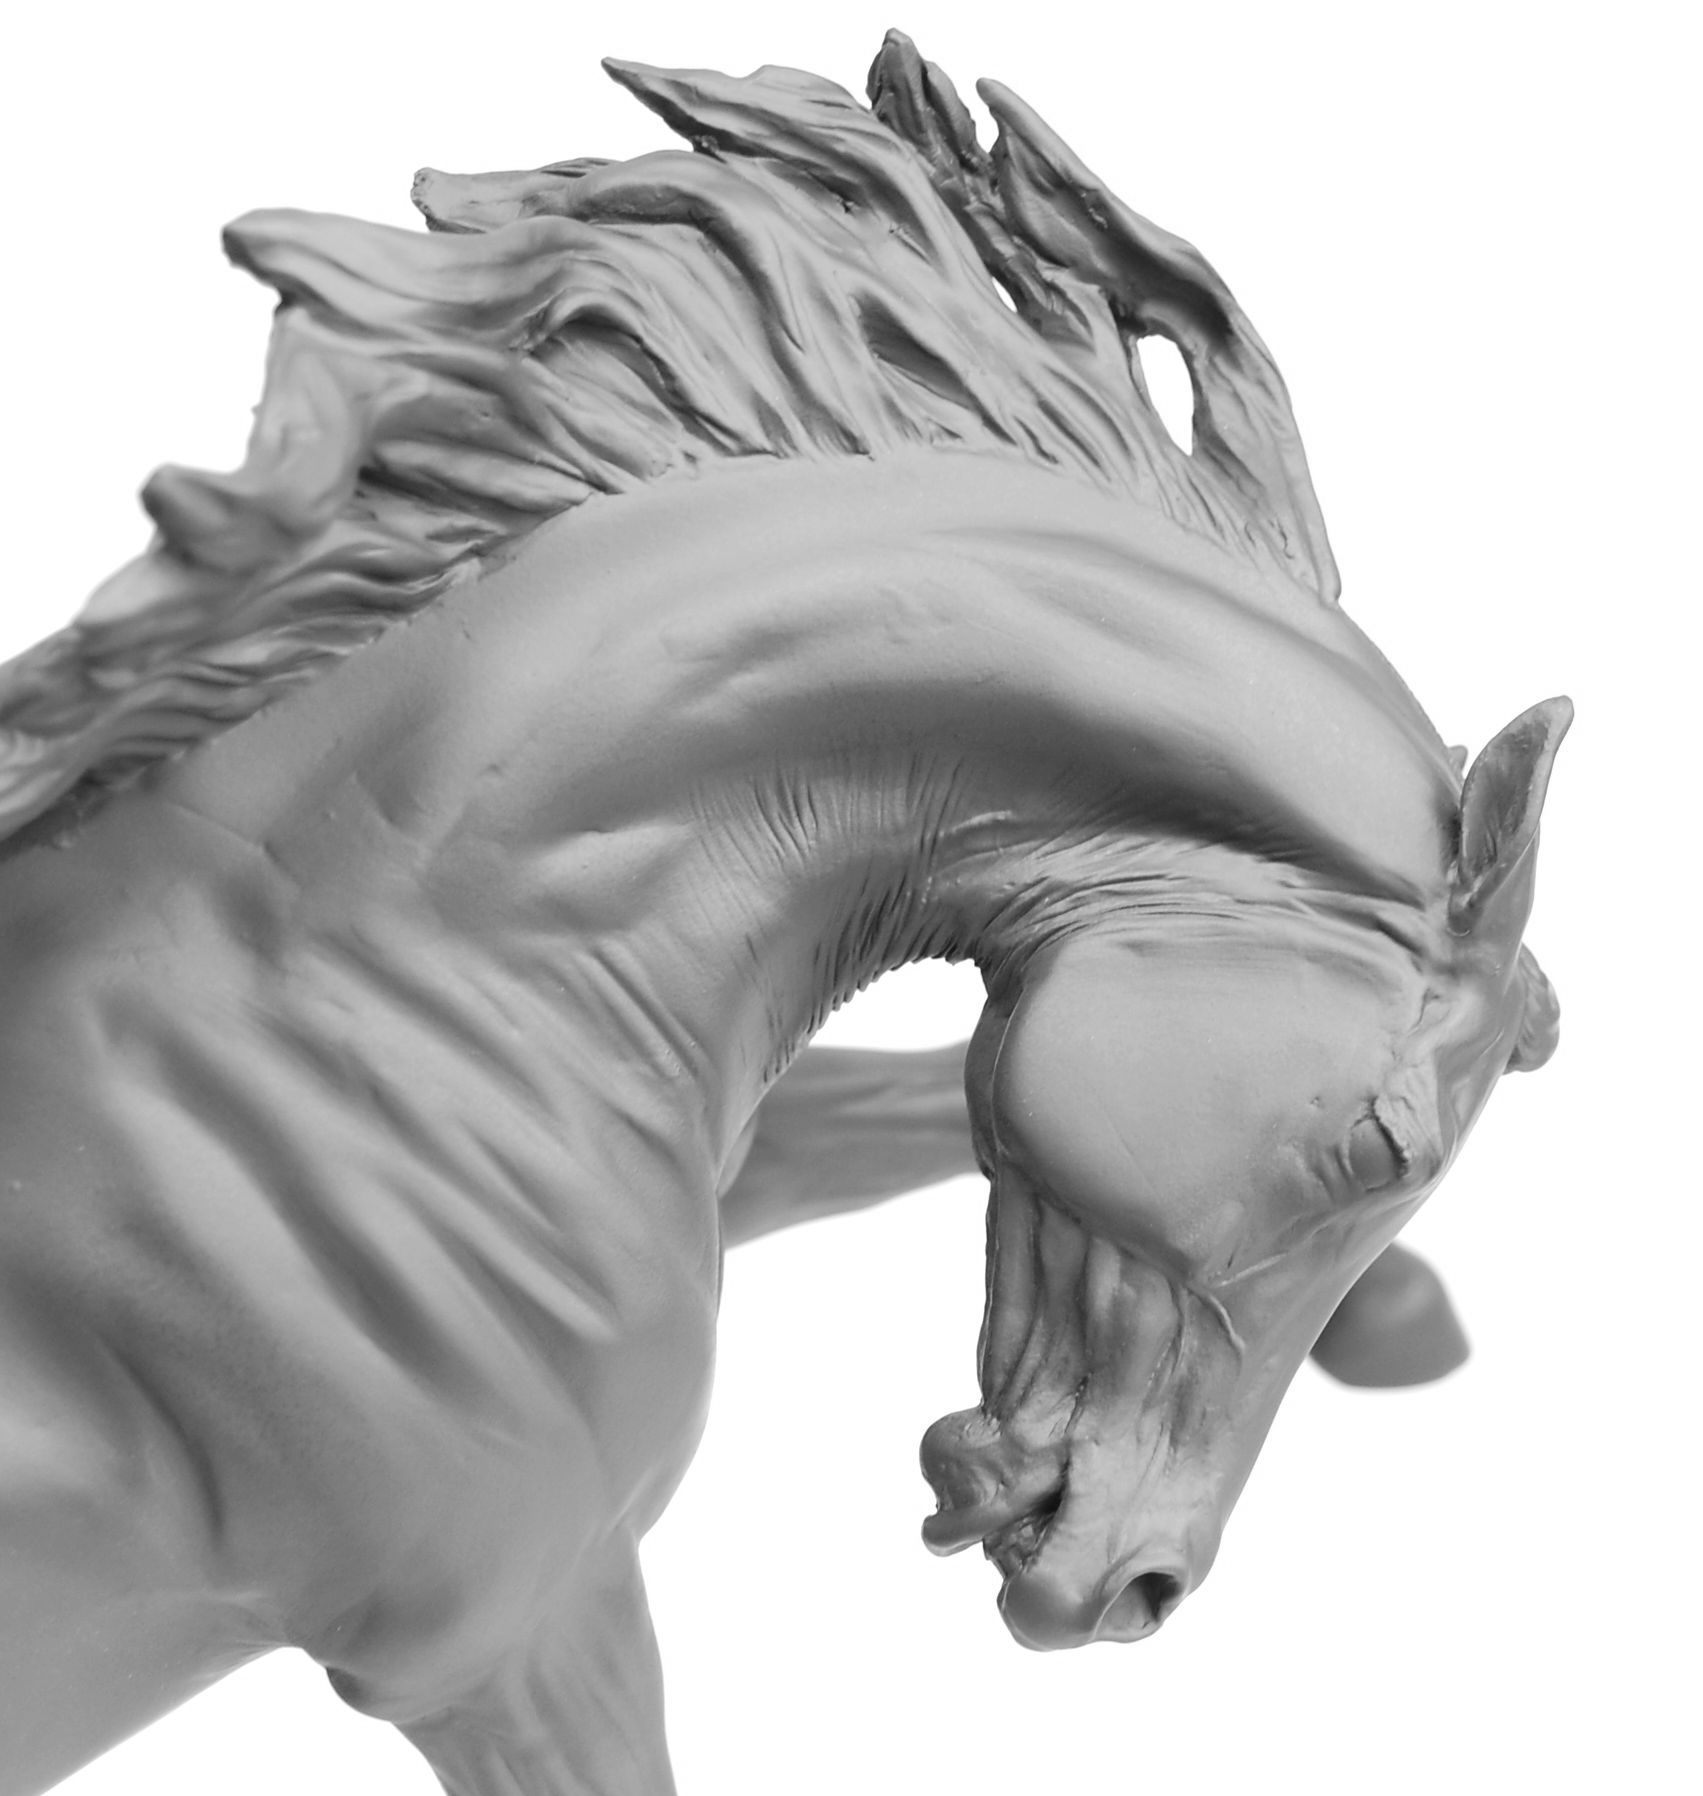
Drastic CM
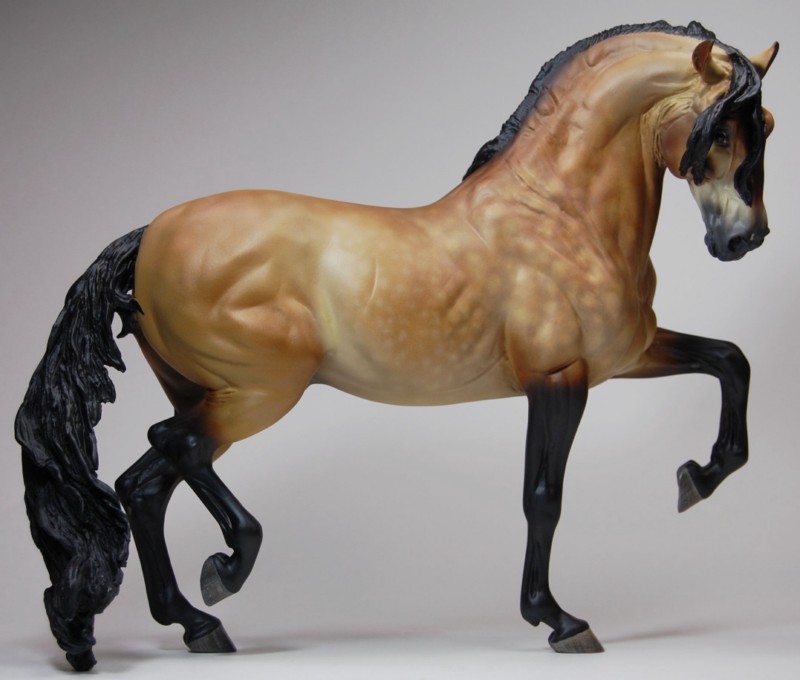
Yeah, I know. I'm terrible about updating my blog! Things have been happening here in the studio, and I haven't dropped off the face of the earth...yet. I've been quite busy in fact, almost entirely with commissions. But here's something that was not a commission, and will in fact be for sale:
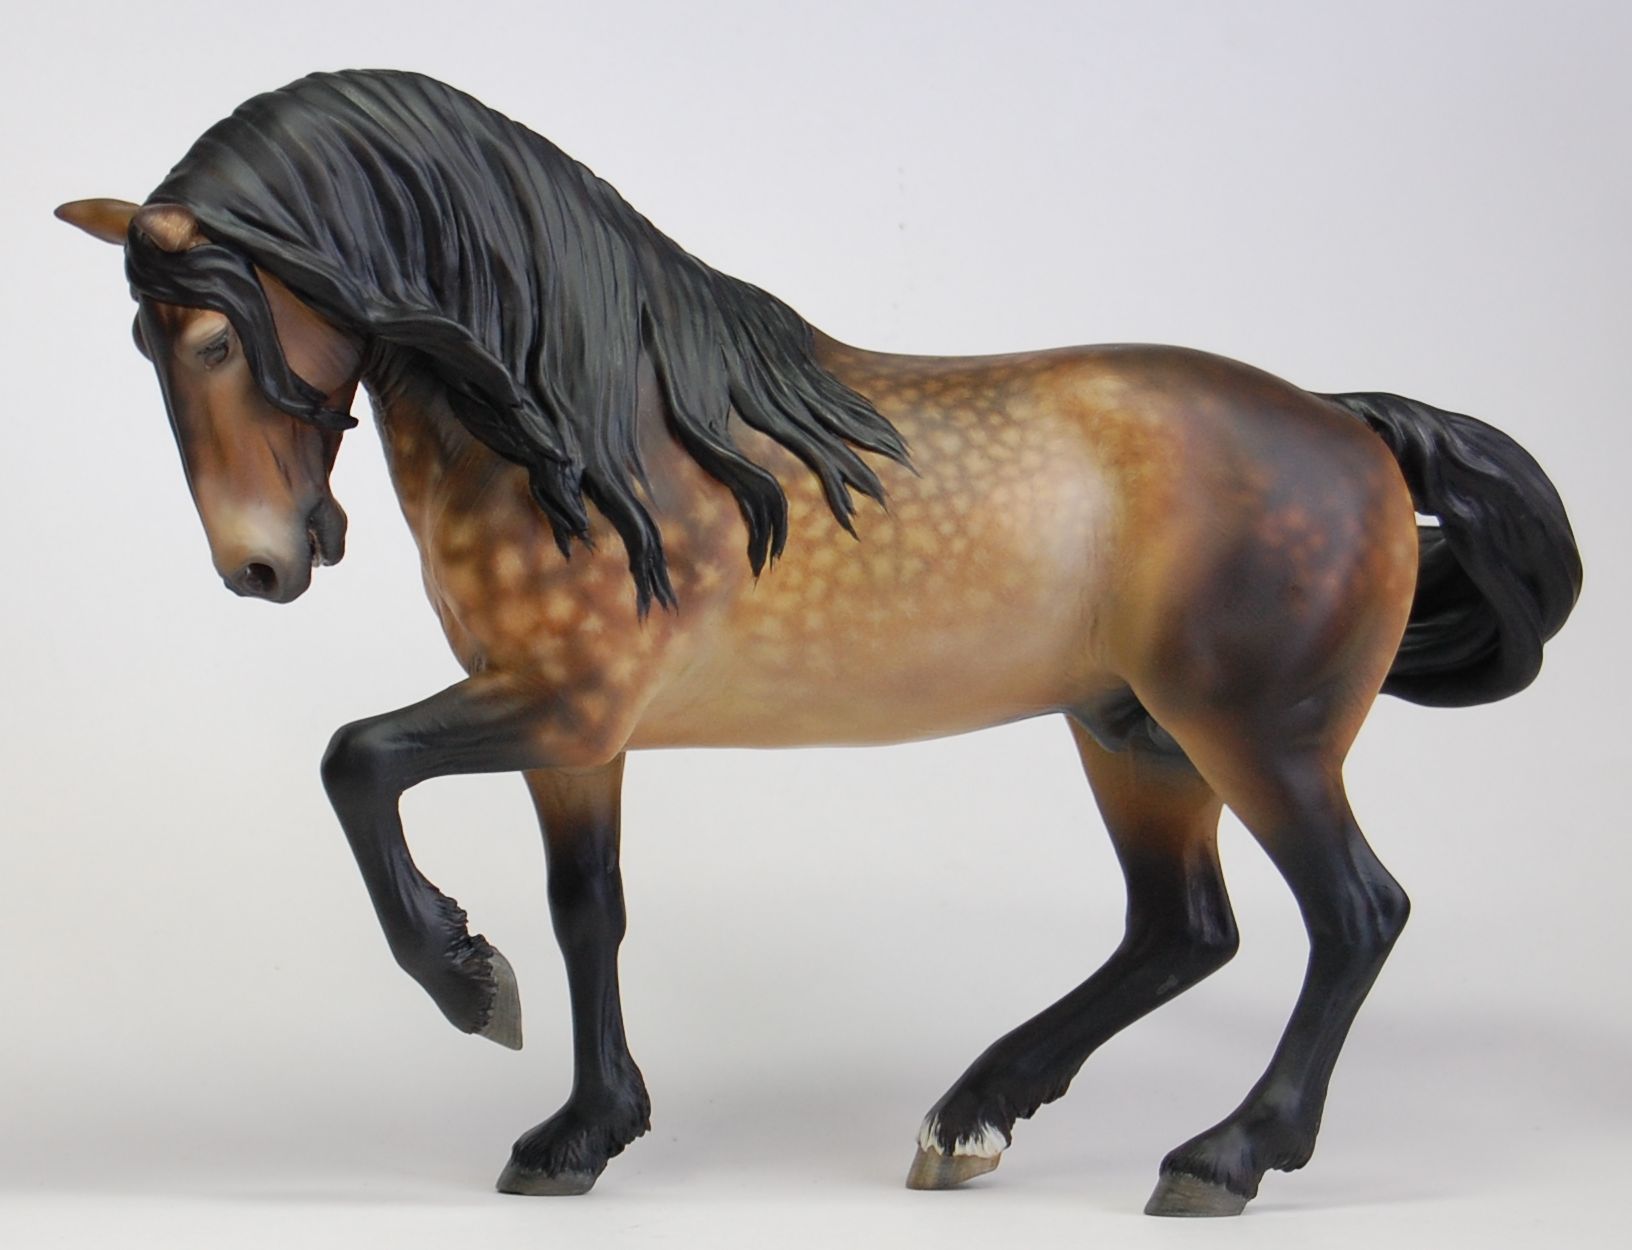
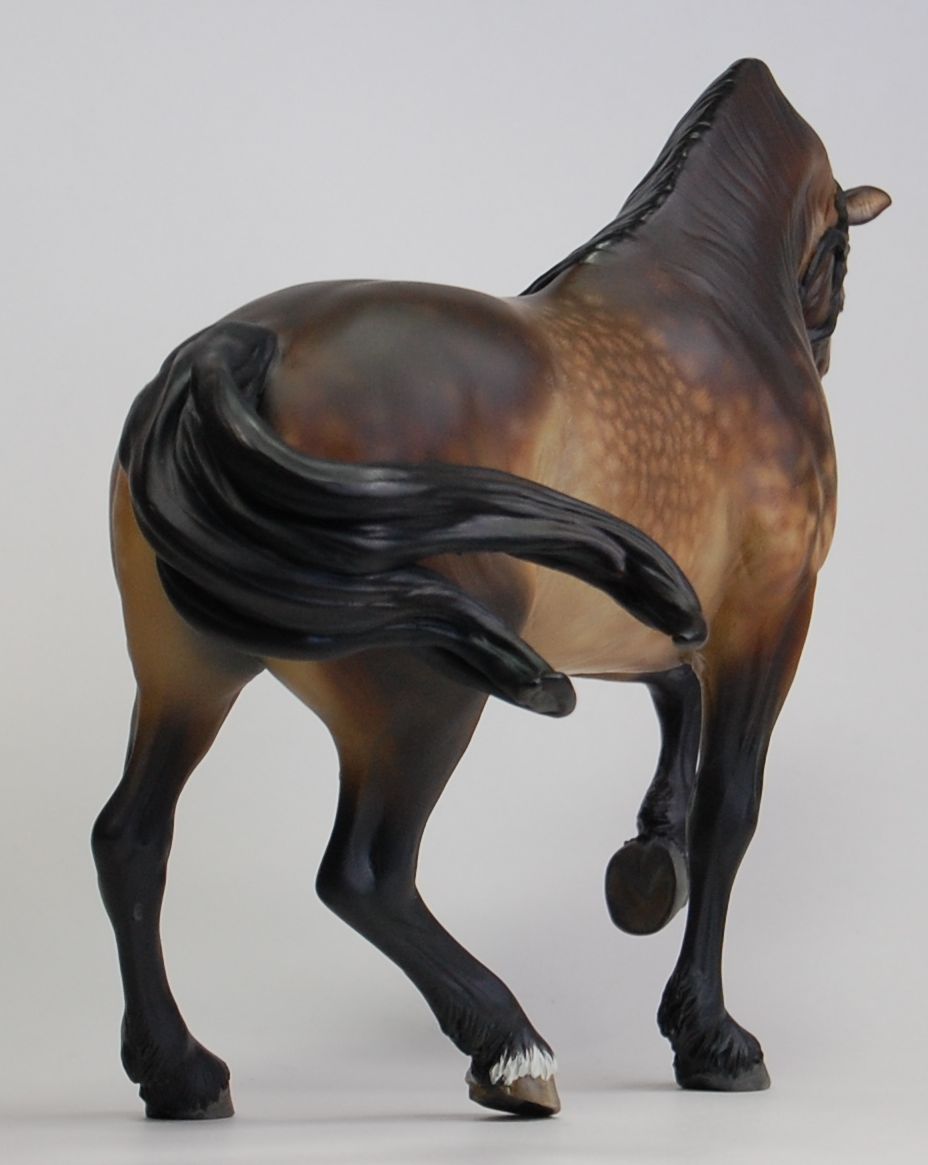 More photos are up at http://maggiebennett.com/buckleg.html and as usual, click on any of them to enlarge!
Friday, August 20, 2010
Tools of the trade--sculpting
I've been very busy with some commissioned sculptures lately--mini scale (between micro mini and stablemate), so all my sculpting tools are out on my desk. I'm often asked what tools I use to sculpt in such small scales, and so here they are!
All the tools, including the important fingers:

This includes everything that I use frequently, except sandpaper. I have a few other tools that I use rarely, but with just these I can do everything I need to!
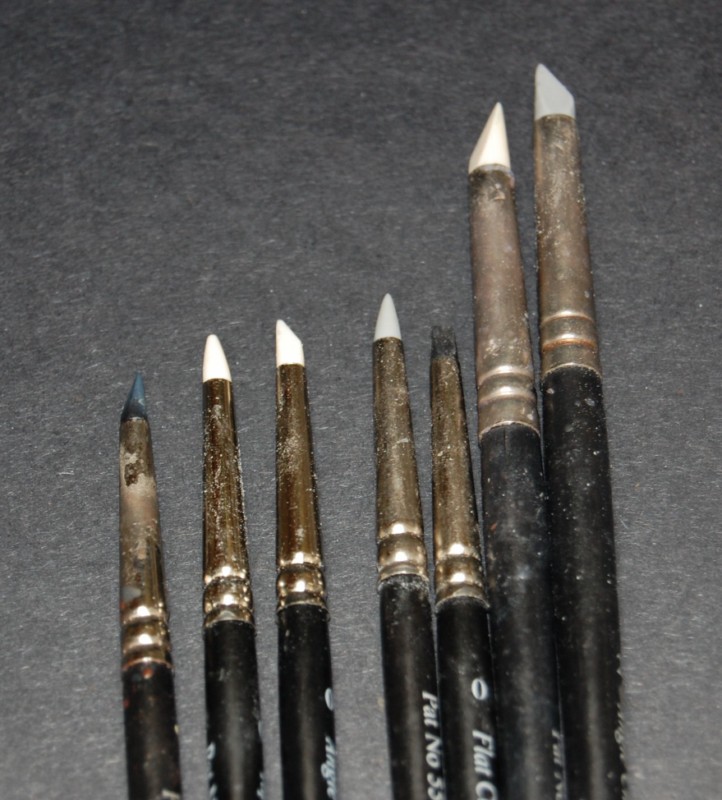
Above are Colour Shapers and Clay Shapers. These are the small ones--I have larger ones that I use on larger sculptures too! These little guys are invaluable. They come in several hardnesses (the white ones are softest while the black ones are hardest) and a number of different shapes. I prefer the Angle Chisels and Taper Points--most of the ones I have are Angle Chisels.
I generally prefer to pick all my tools out in person, but I feel that the clay shapers are a case where this is especially helpful. I went to pick up new ones last week (they do wear out, either from allowing clay to harden on them or from the rubber naturally hardening--they start to develop small cracks and rough spots). I was able to select an especially blunt example of the cone-shaped Taper Point size 0, second from the let above. It's perfect for defining large areas of muscle without leaving a hard line between them--just what I needed! The black Angle Chisel, also in size 0, on the far left I selected specifically for it's very fine point--great for sculpting small details, and on micro minis those small details are small!
Clay Shapers are some of my favorite tools. The rubber tips give a softer line than metal tools, and allow you to move material around in a different way. But they aren't the most pointy things out there, for that you need...
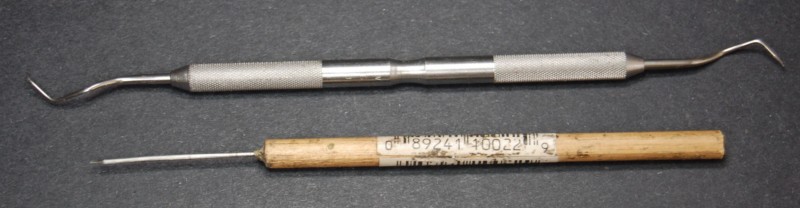
Pointy tools! This is a needle tool and a dental tool. Needle tools like this one can be found at most craft stores. I'd suggest several--keep the points straight on some and bend others a bit. Or go for the dental tools, found in this case at the flea market! I use these mostly, but not exclusively, for working in soft material--epoxy before it has cured. What about after it's cured?

Well, then you need...tools for working in hard stuff! They include carbide scrapers (the full set from Rio Rondo comes with a couple more tips that I seem to be missing), needle files, and an exacto-type craft knife. I also have a small saw that is currently rather broken. With these tools I can carve, slice, file, and generally rearrange hardened material (mostly by removing it). A good stock of blades for the exacto knife is a good idea--don't bother fighting with dull blades when you can buy fresh ones by the hundred from places like Micro-Mark.
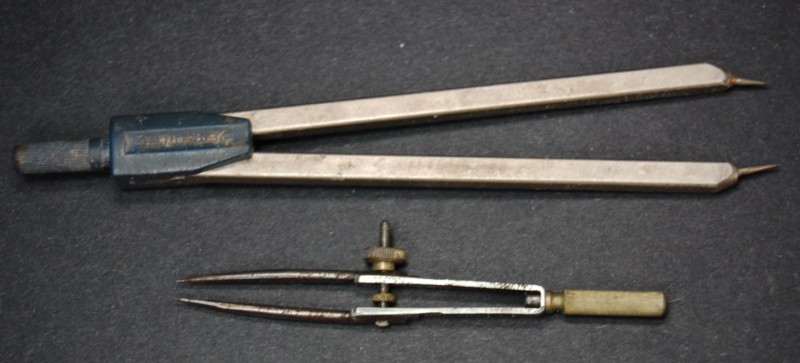
These two tools are very important: calipers! Actually, I believe both of these would be considered dividers, but they work the same. The one on top I got from an office supply store some years ago. It adjusts easily, and gets big enough to be used for more larger horses as well as the little guys. The small one I just got recently, though it's probably older than any of the other tools here--another flea market find. I don't know if this is its intended use, but it works! You need some form of dividers to check measurements--things like making sure both sides are symmetrical.
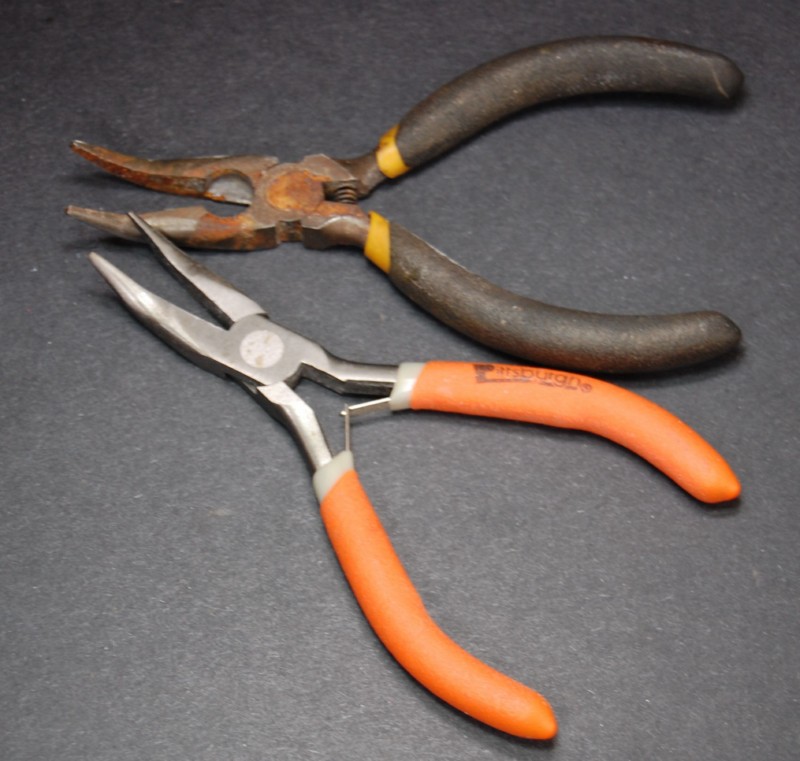
Needlenose pliers. I have several pairs, in varying degrees of repair. The black-handled ones are rusty but have wire cutters, the orange-handled ones have smooth jaws. Both are very useful for bending wire, creating and positioning armatures, and even for removing cured epoxy (by crushing it).

Last, but not least, is a good light source. I have two of these little lamps, picked up from IKEA for a song some years ago. They have a bright bulb (halogen, maybe?) and put off rather a lot of heat for their size. This is actually a good thing! I use one light for my light source when sculpting, and the other I use as a heat source to speed the curing of epoxy. I can fully cure epoxy in about 15 minutes instead of 3+ hours, which means far less time spent sitting around waiting.
For sculpting, I prefer a light source that is nearer to being a "point" source, rather than a diffuse source like a fluorescent bulb. I do prefer fluorescents and other diffuse light when painting, but the hard, sharp light from a point source makes it easier to see the detail of a sculpture for me. Lots of light is very important to small-scale sculpting--the more light you have, the better your eyes can focus, and the better you can see--and seeing is half the battle! It's a physics thing: the smaller the aperture, the sharper the focus.
Note that I don't use any sort of magnifying devices. I've tried those nifty headband-type magnifiers and just had too many problems with depth perception and with holding the sculpture in just the right place so it remained in focus. I know they work for lots of other people, jut not for me!
I won't say that any one of these tools is a magic bullet, or even that anyone needs any of them. They're just what work for me right now! Different people use different tools, and differences in sculpting style may translate into different preferences in tools.
All the tools, including the important fingers:
This includes everything that I use frequently, except sandpaper. I have a few other tools that I use rarely, but with just these I can do everything I need to!
Above are Colour Shapers and Clay Shapers. These are the small ones--I have larger ones that I use on larger sculptures too! These little guys are invaluable. They come in several hardnesses (the white ones are softest while the black ones are hardest) and a number of different shapes. I prefer the Angle Chisels and Taper Points--most of the ones I have are Angle Chisels.
I generally prefer to pick all my tools out in person, but I feel that the clay shapers are a case where this is especially helpful. I went to pick up new ones last week (they do wear out, either from allowing clay to harden on them or from the rubber naturally hardening--they start to develop small cracks and rough spots). I was able to select an especially blunt example of the cone-shaped Taper Point size 0, second from the let above. It's perfect for defining large areas of muscle without leaving a hard line between them--just what I needed! The black Angle Chisel, also in size 0, on the far left I selected specifically for it's very fine point--great for sculpting small details, and on micro minis those small details are small!
Clay Shapers are some of my favorite tools. The rubber tips give a softer line than metal tools, and allow you to move material around in a different way. But they aren't the most pointy things out there, for that you need...
Pointy tools! This is a needle tool and a dental tool. Needle tools like this one can be found at most craft stores. I'd suggest several--keep the points straight on some and bend others a bit. Or go for the dental tools, found in this case at the flea market! I use these mostly, but not exclusively, for working in soft material--epoxy before it has cured. What about after it's cured?
Well, then you need...tools for working in hard stuff! They include carbide scrapers (the full set from Rio Rondo comes with a couple more tips that I seem to be missing), needle files, and an exacto-type craft knife. I also have a small saw that is currently rather broken. With these tools I can carve, slice, file, and generally rearrange hardened material (mostly by removing it). A good stock of blades for the exacto knife is a good idea--don't bother fighting with dull blades when you can buy fresh ones by the hundred from places like Micro-Mark.
These two tools are very important: calipers! Actually, I believe both of these would be considered dividers, but they work the same. The one on top I got from an office supply store some years ago. It adjusts easily, and gets big enough to be used for more larger horses as well as the little guys. The small one I just got recently, though it's probably older than any of the other tools here--another flea market find. I don't know if this is its intended use, but it works! You need some form of dividers to check measurements--things like making sure both sides are symmetrical.
Needlenose pliers. I have several pairs, in varying degrees of repair. The black-handled ones are rusty but have wire cutters, the orange-handled ones have smooth jaws. Both are very useful for bending wire, creating and positioning armatures, and even for removing cured epoxy (by crushing it).
Last, but not least, is a good light source. I have two of these little lamps, picked up from IKEA for a song some years ago. They have a bright bulb (halogen, maybe?) and put off rather a lot of heat for their size. This is actually a good thing! I use one light for my light source when sculpting, and the other I use as a heat source to speed the curing of epoxy. I can fully cure epoxy in about 15 minutes instead of 3+ hours, which means far less time spent sitting around waiting.
For sculpting, I prefer a light source that is nearer to being a "point" source, rather than a diffuse source like a fluorescent bulb. I do prefer fluorescents and other diffuse light when painting, but the hard, sharp light from a point source makes it easier to see the detail of a sculpture for me. Lots of light is very important to small-scale sculpting--the more light you have, the better your eyes can focus, and the better you can see--and seeing is half the battle! It's a physics thing: the smaller the aperture, the sharper the focus.
Note that I don't use any sort of magnifying devices. I've tried those nifty headband-type magnifiers and just had too many problems with depth perception and with holding the sculpture in just the right place so it remained in focus. I know they work for lots of other people, jut not for me!
I won't say that any one of these tools is a magic bullet, or even that anyone needs any of them. They're just what work for me right now! Different people use different tools, and differences in sculpting style may translate into different preferences in tools.
Sunday, July 18, 2010
Breyerfest and NAN!
Friday, June 25, 2010
Painting is fun!

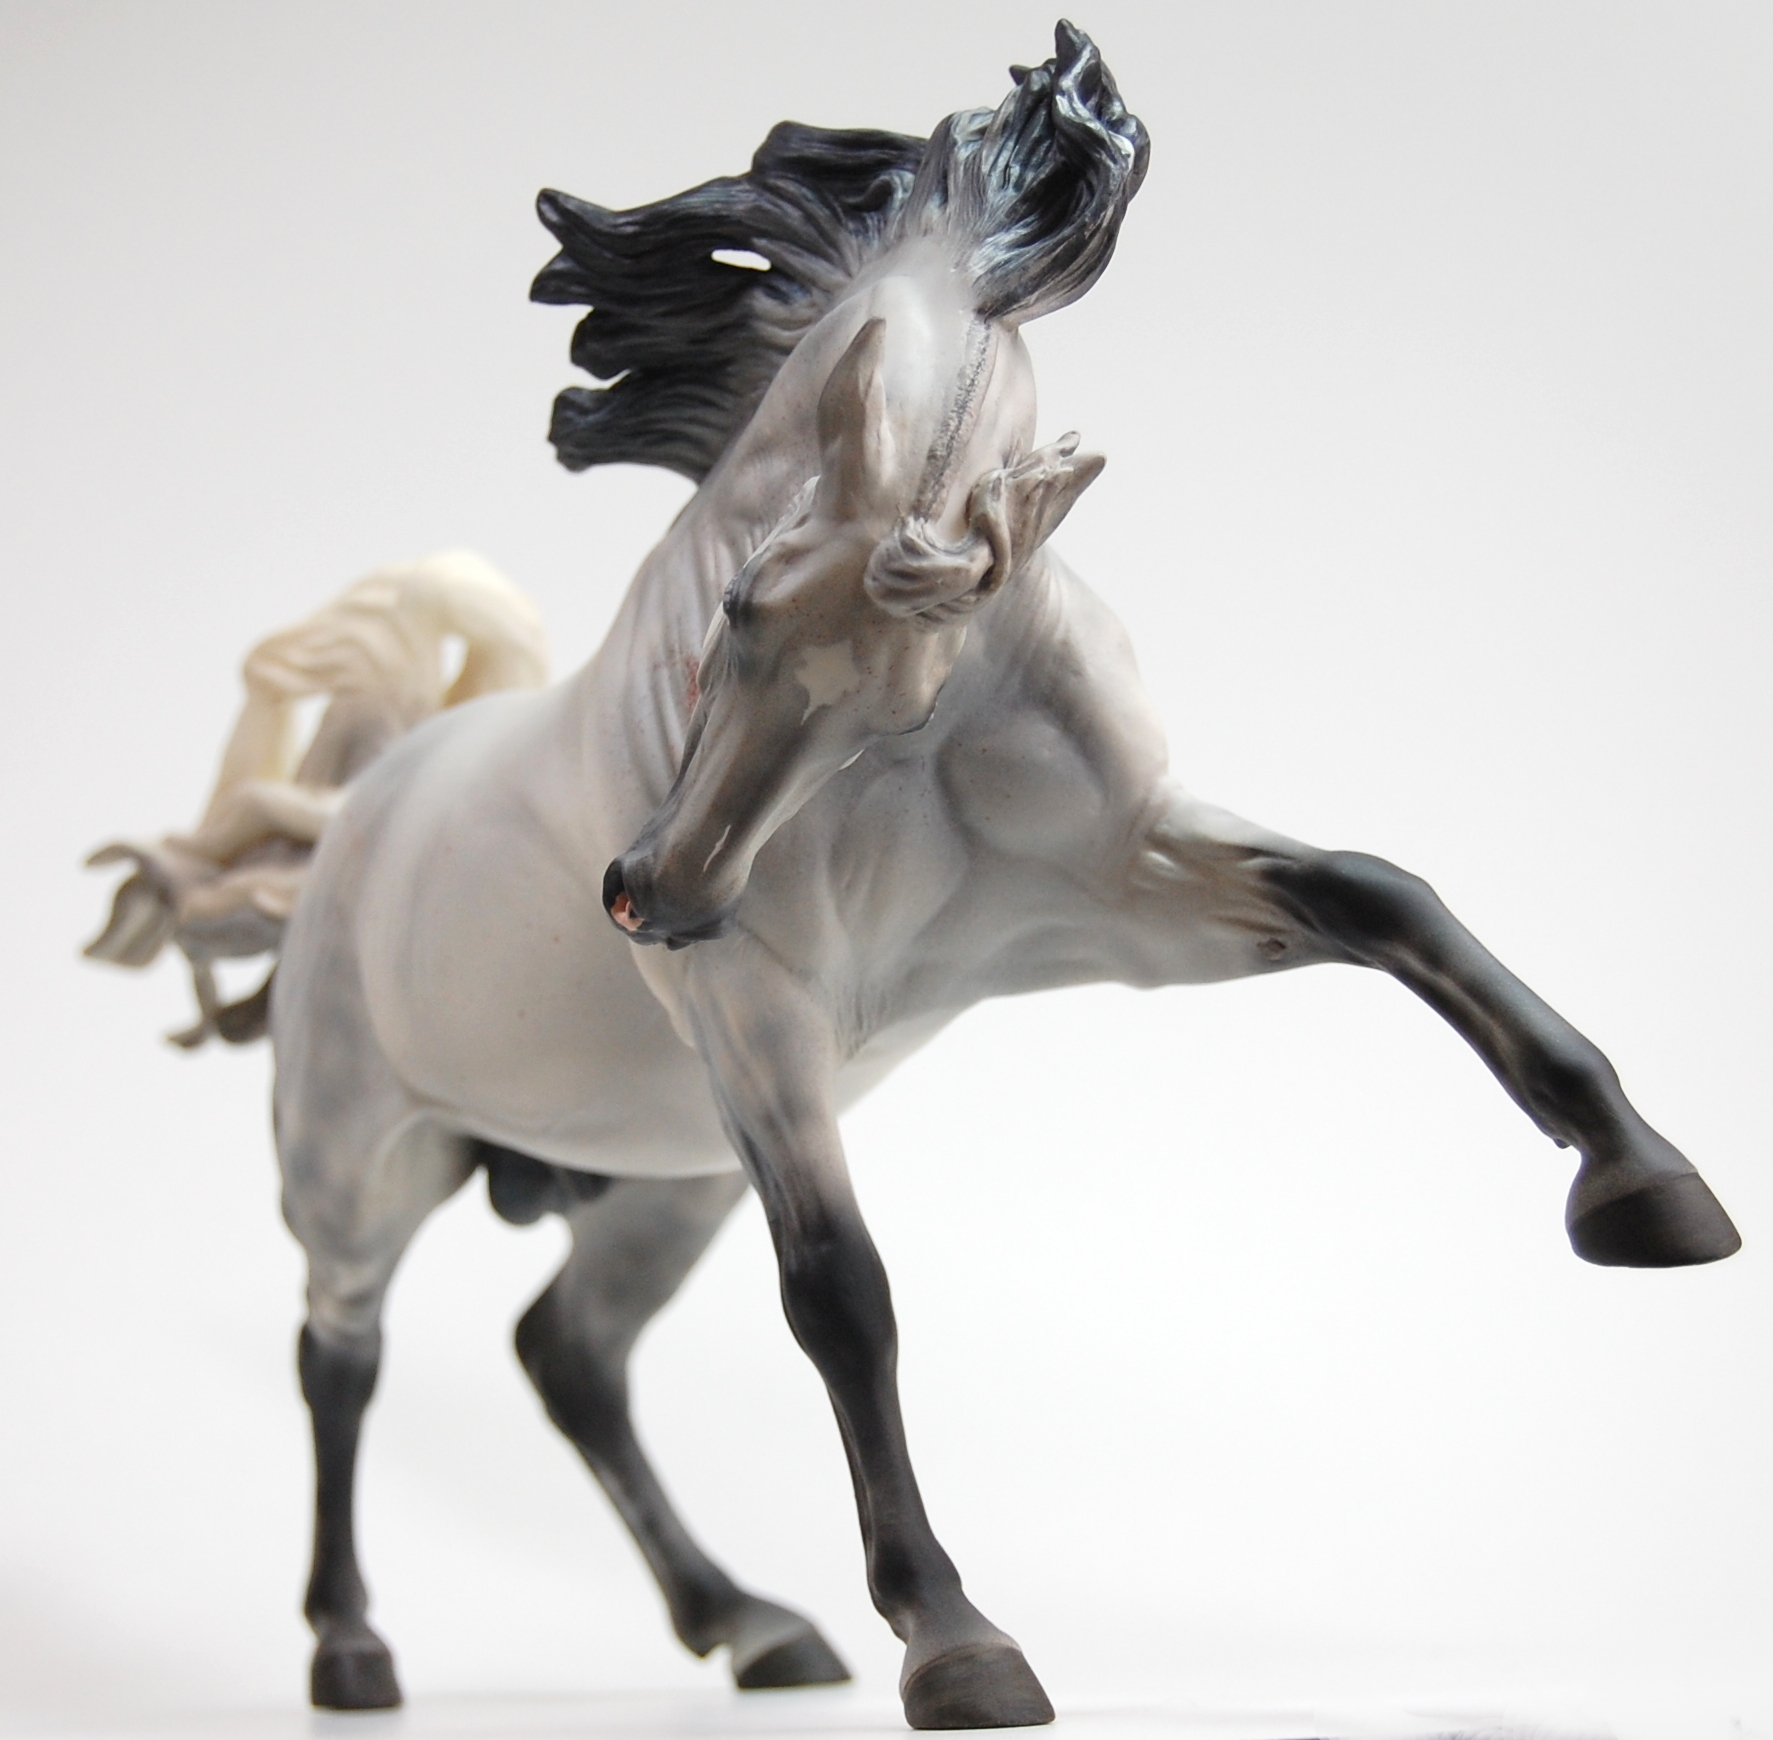
I do like painting, and some sculptures are just a delight to paint. I'm happy to report that Supernova seems to be one of those!
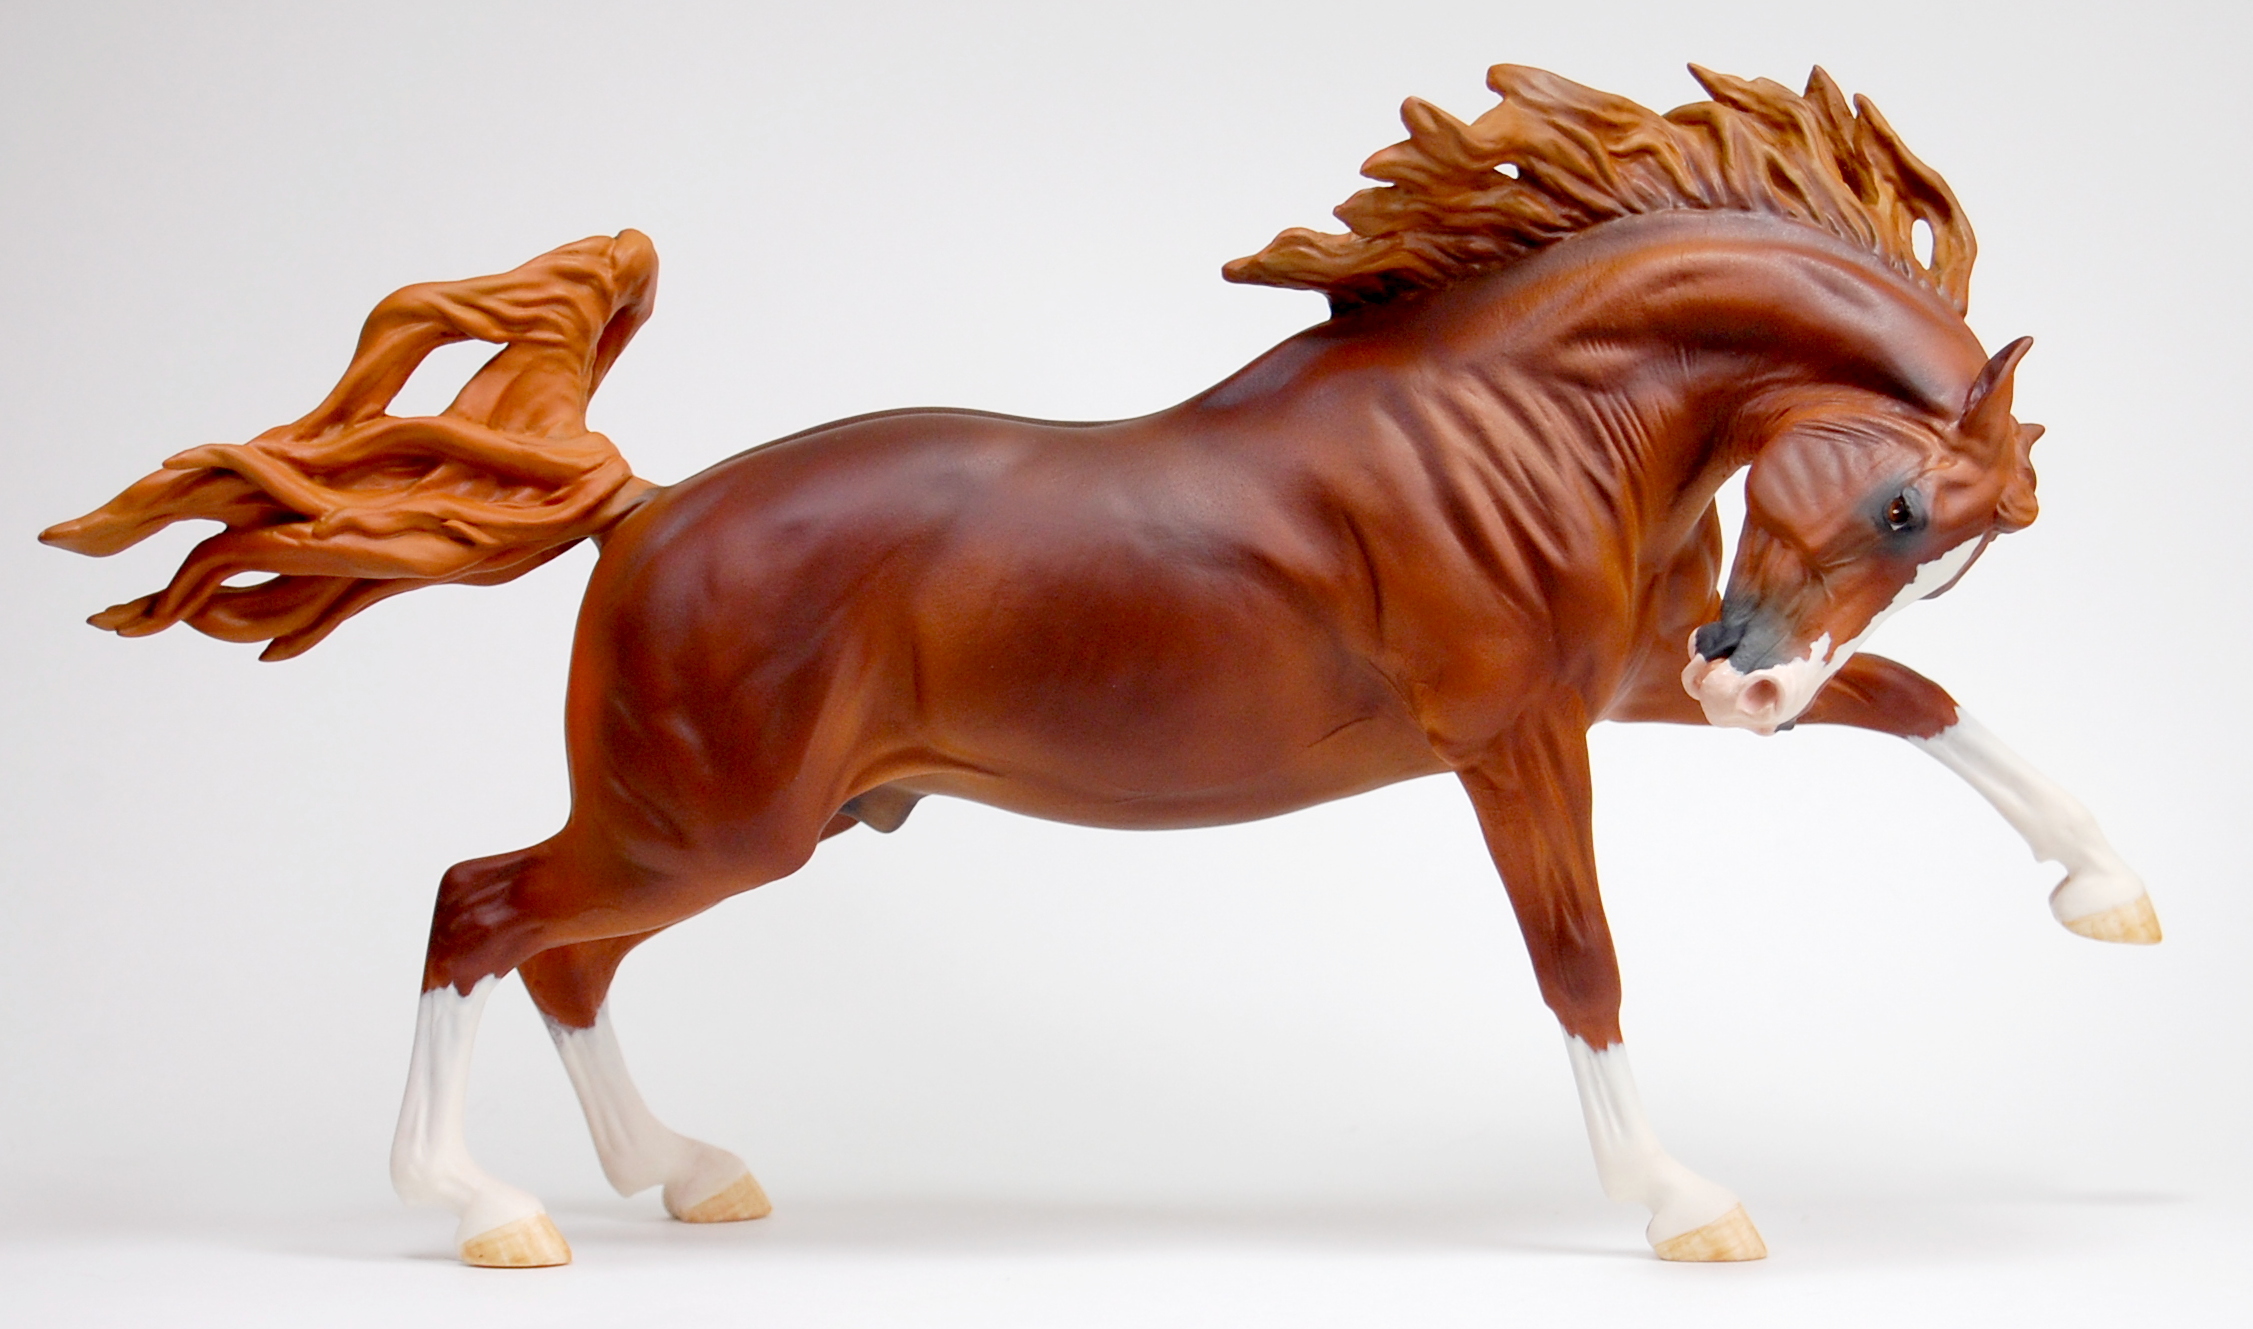
These three are all very much in progress.
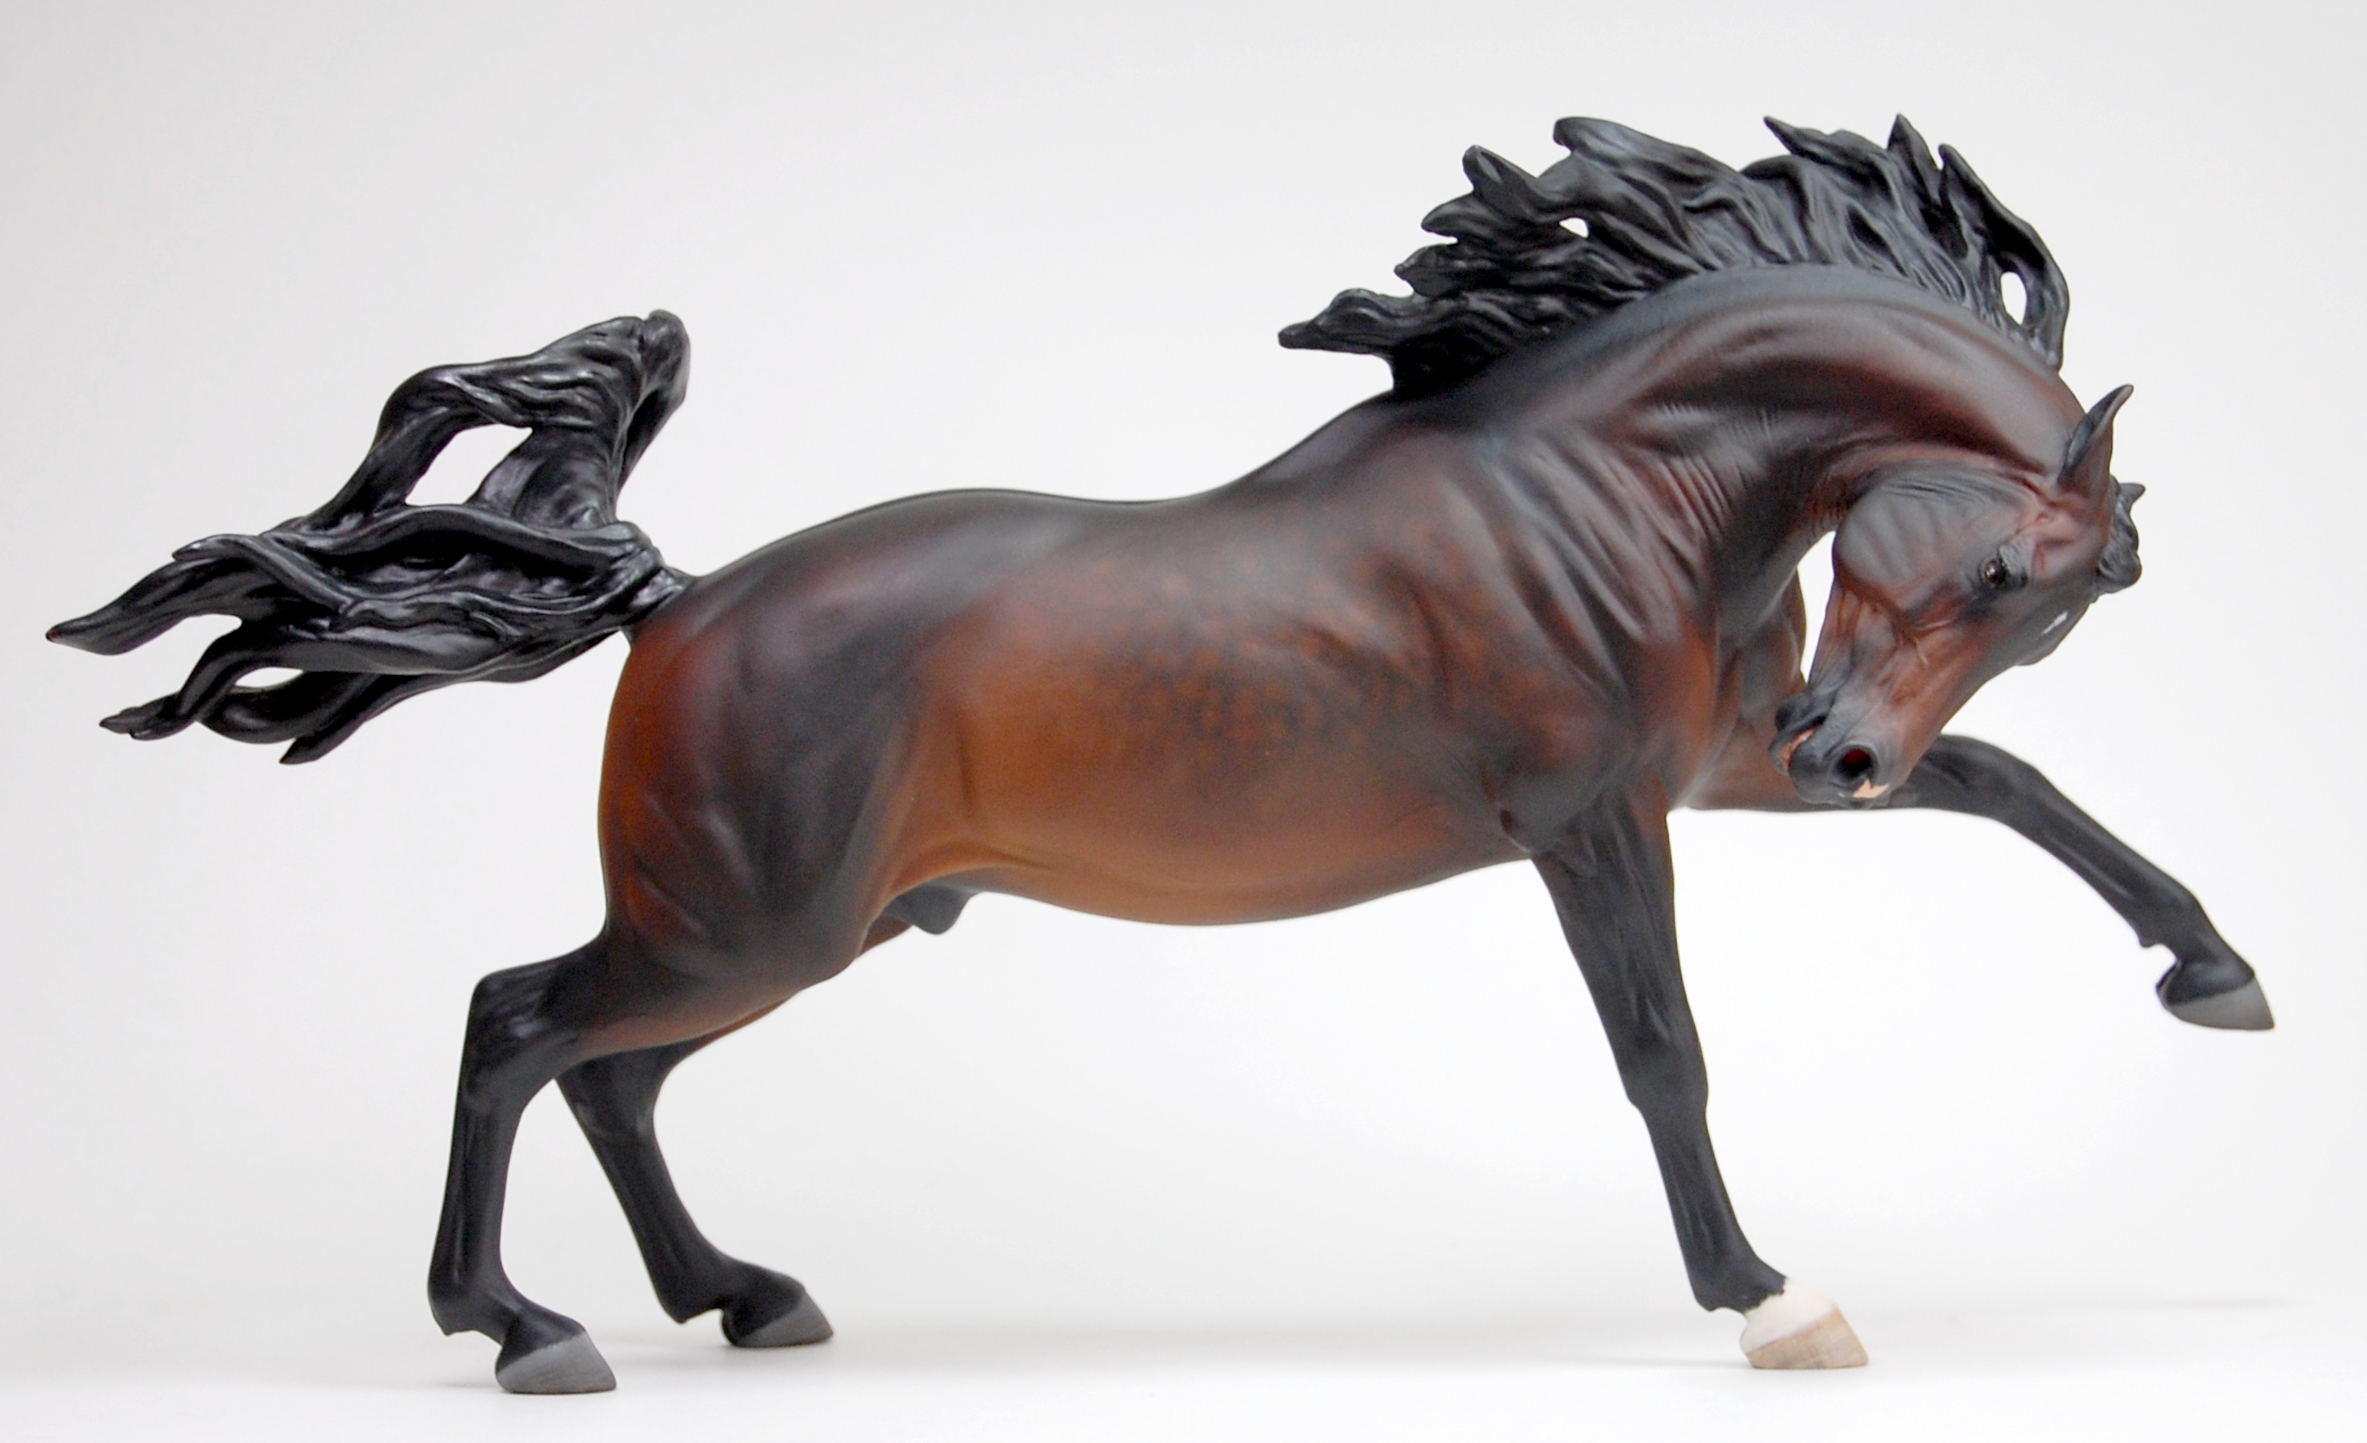
I'm planning to keep the bay...

But the grey and the chestnut will be for sale at some point.
Monday, June 14, 2010
Nova's coming!
I just got the notification from MVS that my Supernovas are on the way, which means that the pre-order ones will be on their ways soon and that it is time for me to begin taking orders in earnest! I will be notifying the wait list folks first and then opening it up to everyone. I'm so excited about getting him in--can't wait to paint him!
Tuesday, May 4, 2010
Supernova--done and available for preorder!


Supernova is available for preorder now. I'm offering 15 resins for preorder and will sell the remainder of the two-to-three mold run once the first mold has been made, which should be within 6-8 weeks. He is $240+$15 shipping/handling within the USA or $30 s/h internationally. Please email me at maggie@maggiebennett.com if you'd like to order yours!
Oh, and there are lots more photos up at http://maggiebennett.com/supernova.htm
Friday, April 23, 2010
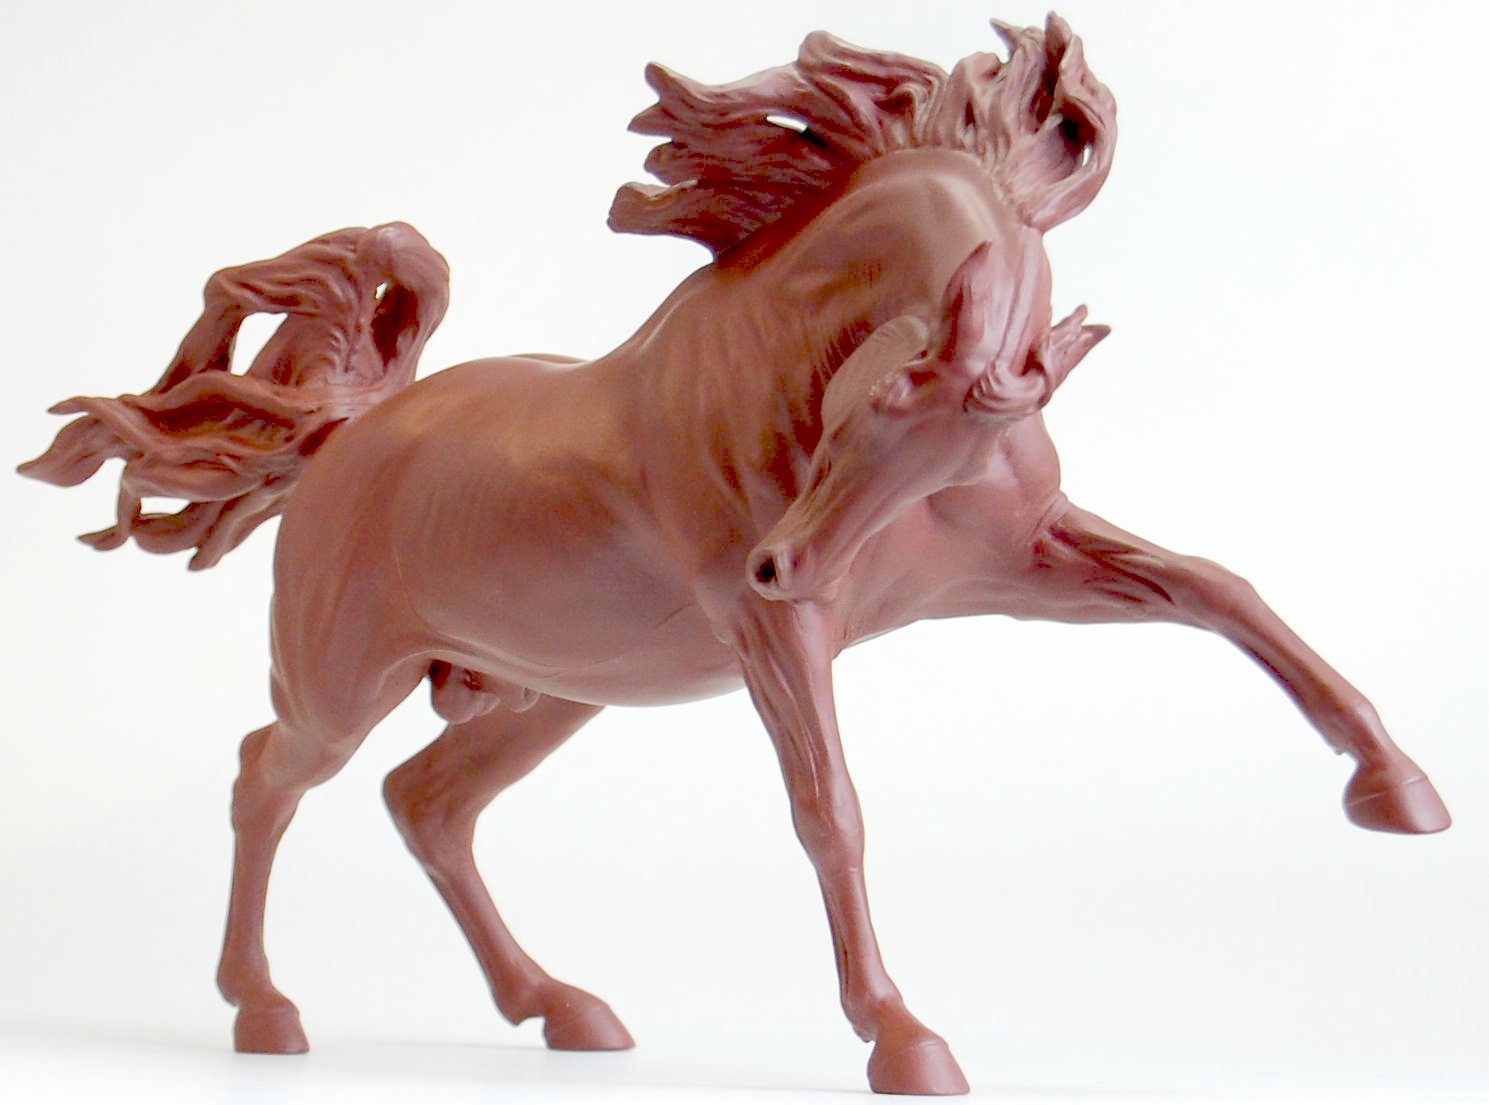
Supernova--nearing completion!
At long last I think Nova is getting very close to being finished. I spent quite a lot of time lately working on corrections after the massive critique that Sarah Minkiewicz-Breunig did for the Wind Ward column of the RESS publication, The Boat (and for any other equine artists reading this I highly recommend joining RESS, http://ress.org/). It won't appear in the magazine for a while since there were other pieces in line ahead of Supernova, but it will be showing up there eventually, and in the meantime I was able to use it to fix him up!
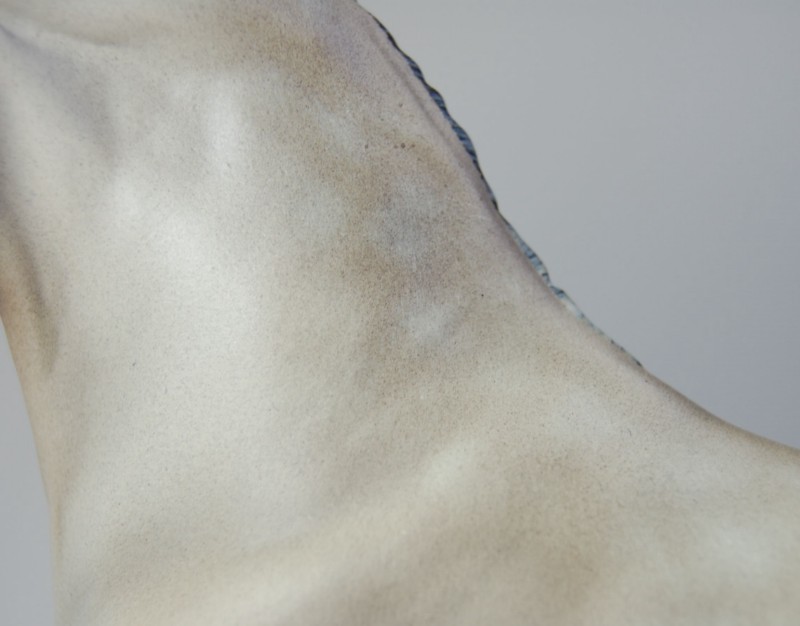
 I still have most of his "skin" to do--wrinkles, veins, little stretchy bits of skin--although I've started on some of each (facial veins, some neck wrinkles, stretchy skin on his butt).
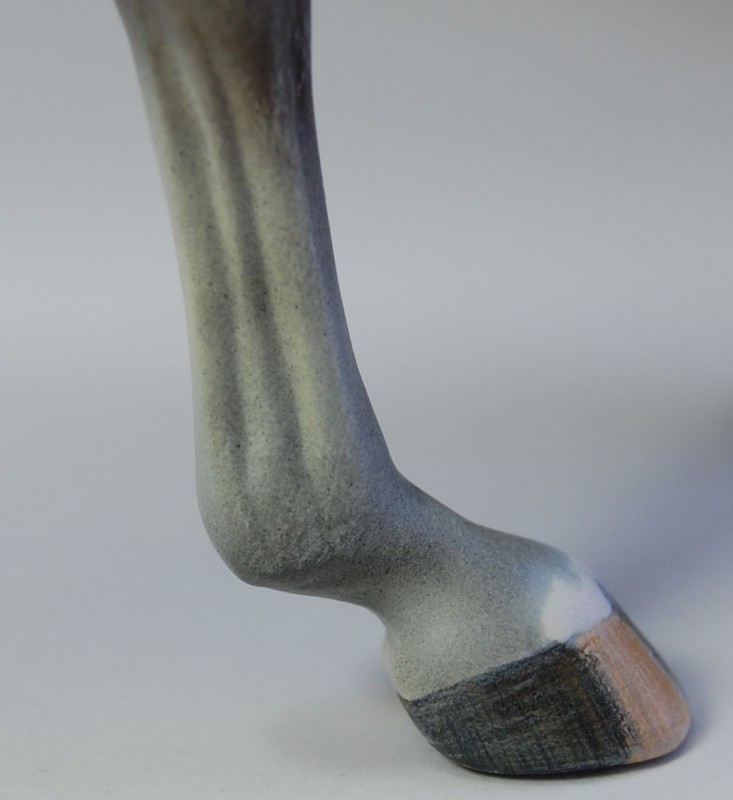
 And some of his hooves still need a touch of reshaping...
 And there are some nicks and such that needs filling and smoothing...
 But he's definitely getting close! Funny mouth and all (top lip going to his right, bottom to the left):

More pictures at http://maggiebennett.com/supernova.htm.
I'm not taking pre-orders on him just yet but I will take some once he is finished (which hopefully will be within a week or so)! I need to discuss him with the casters and run some more numbers before I can commit to a price but he will probably be less expensive than Zim (who is $315) and more expensive than Cooper ($195).
I have some finishwork that I'm wrapping up too, but I want the horses' owners to see them first so that shall be another post!
Friday, March 19, 2010
Khonsu's Auction
Gah! I totally forgot to post the link to his auction here, sorry about that! It's here. He's ending Sunday night.
Sunday, March 14, 2010
Also...
I just changed my eBay ID. If I had known it was so easy I would have done it ages ago! It's now Maggie_Bennett. I'll post a link to Khonsu's auction when it goes live!
Computer problems
This evening my computer was giving me a "hard drive not found"-type of error. Tech support wasn't able to help since it's a hardware problem, but after I got off the phone with them I kept messing with it and was able to get it to work again. But I have a feeling it could fail any minute, so just in case it does please be aware that I'm not intentionally ignoring anything! I will do my best to keep up with email etc. if it does go out again. Khonsu's auction is already scheduled for Tuesday night so that should go live regardless of my computer issues. Hopefully when I talk to tech support again tomorrow they will help me get the computer fixed so this won't happen again!
Tuesday, March 9, 2010
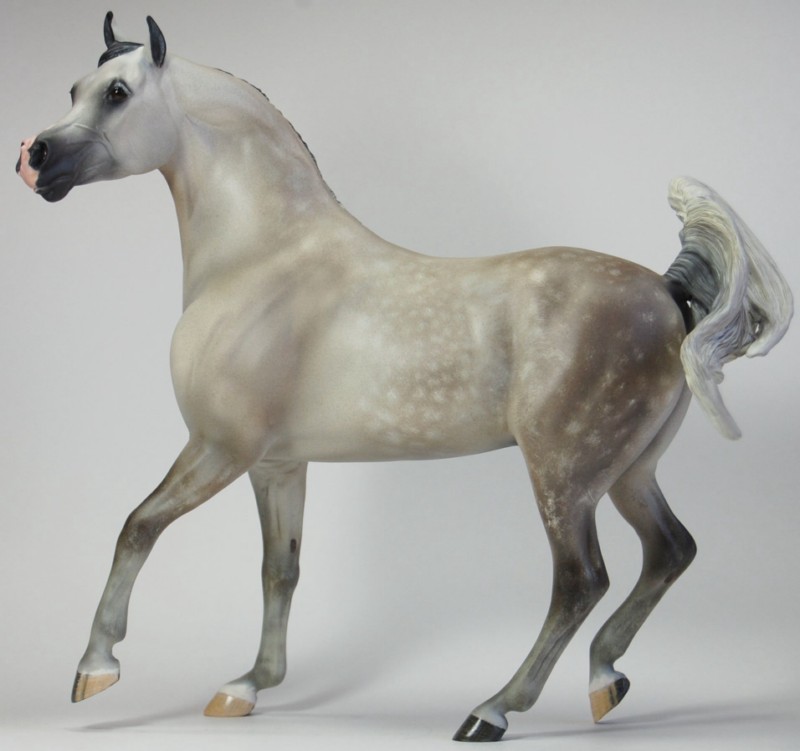
"Khonsu"--CM Sham
That custom Sham from my last post is finally finished and named! He is "Khonsu", and I am quite pleased with him. I'm going to put the information from the page I'm working on for him here. He'll be going up on eBay next week--starting March 16.
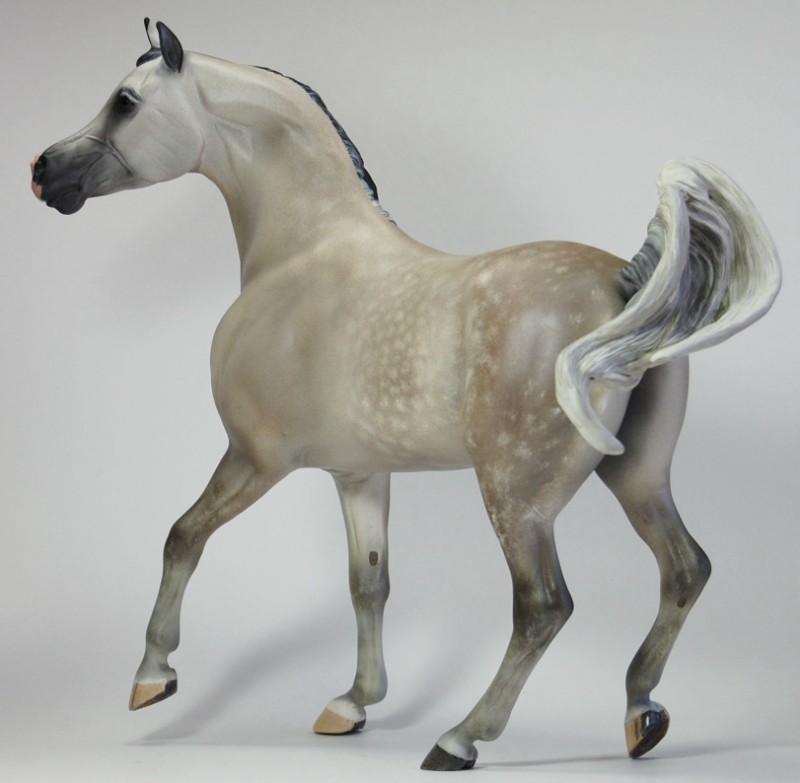
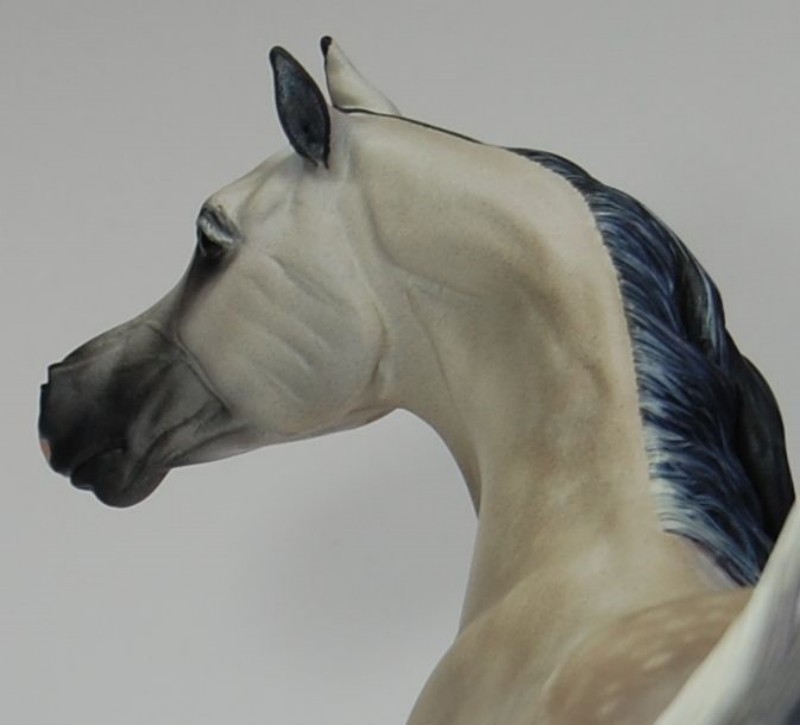
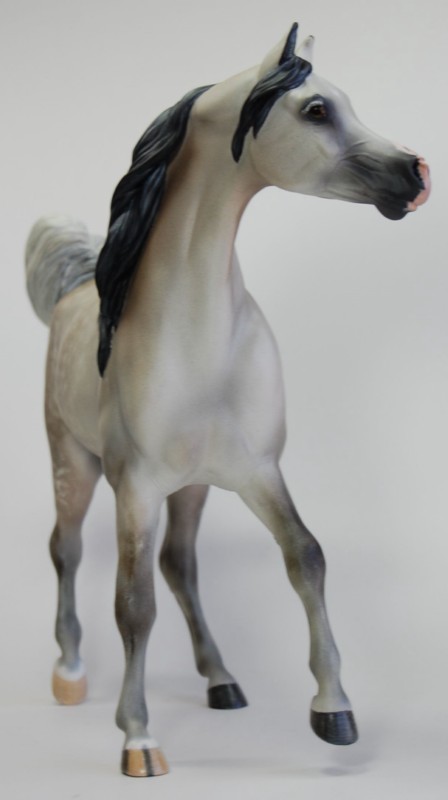
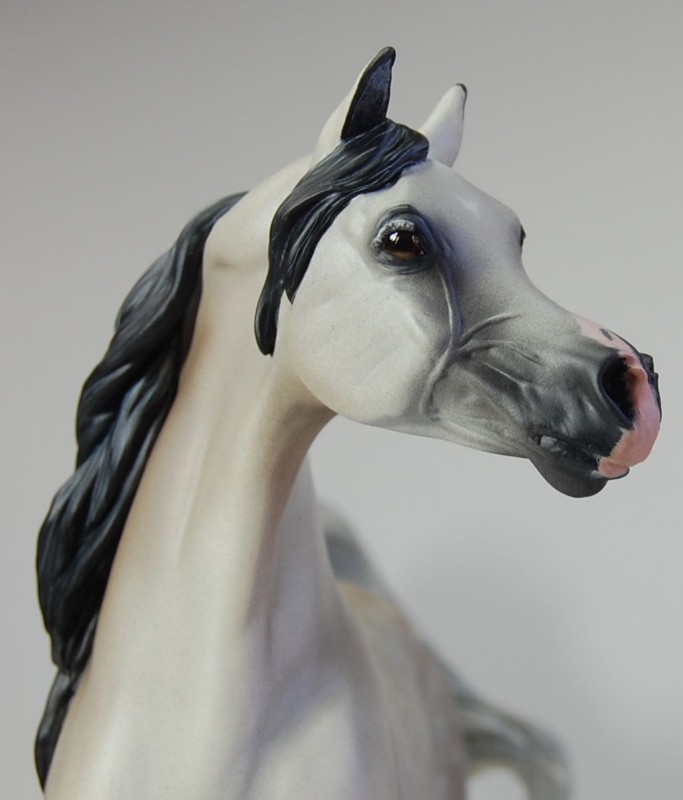
Introducing "Khonsu"
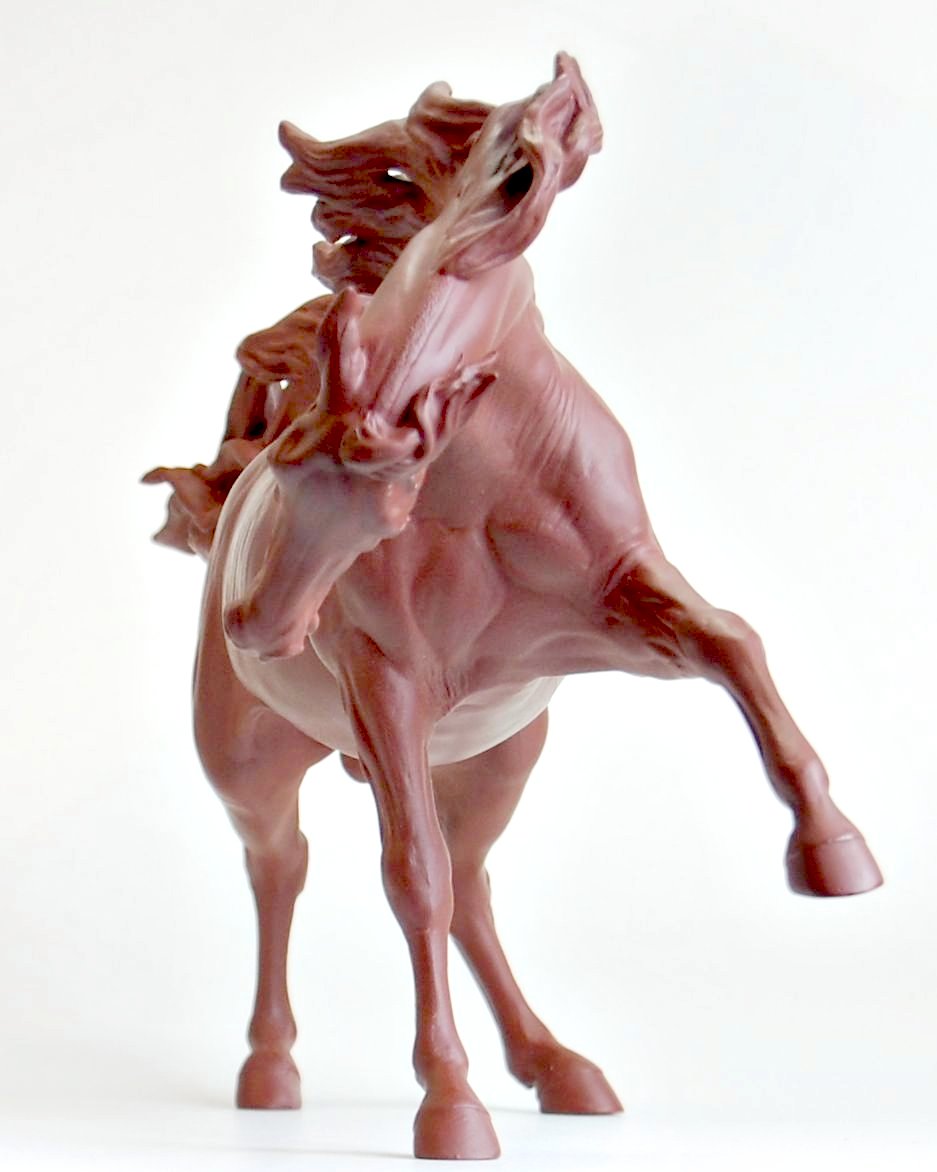
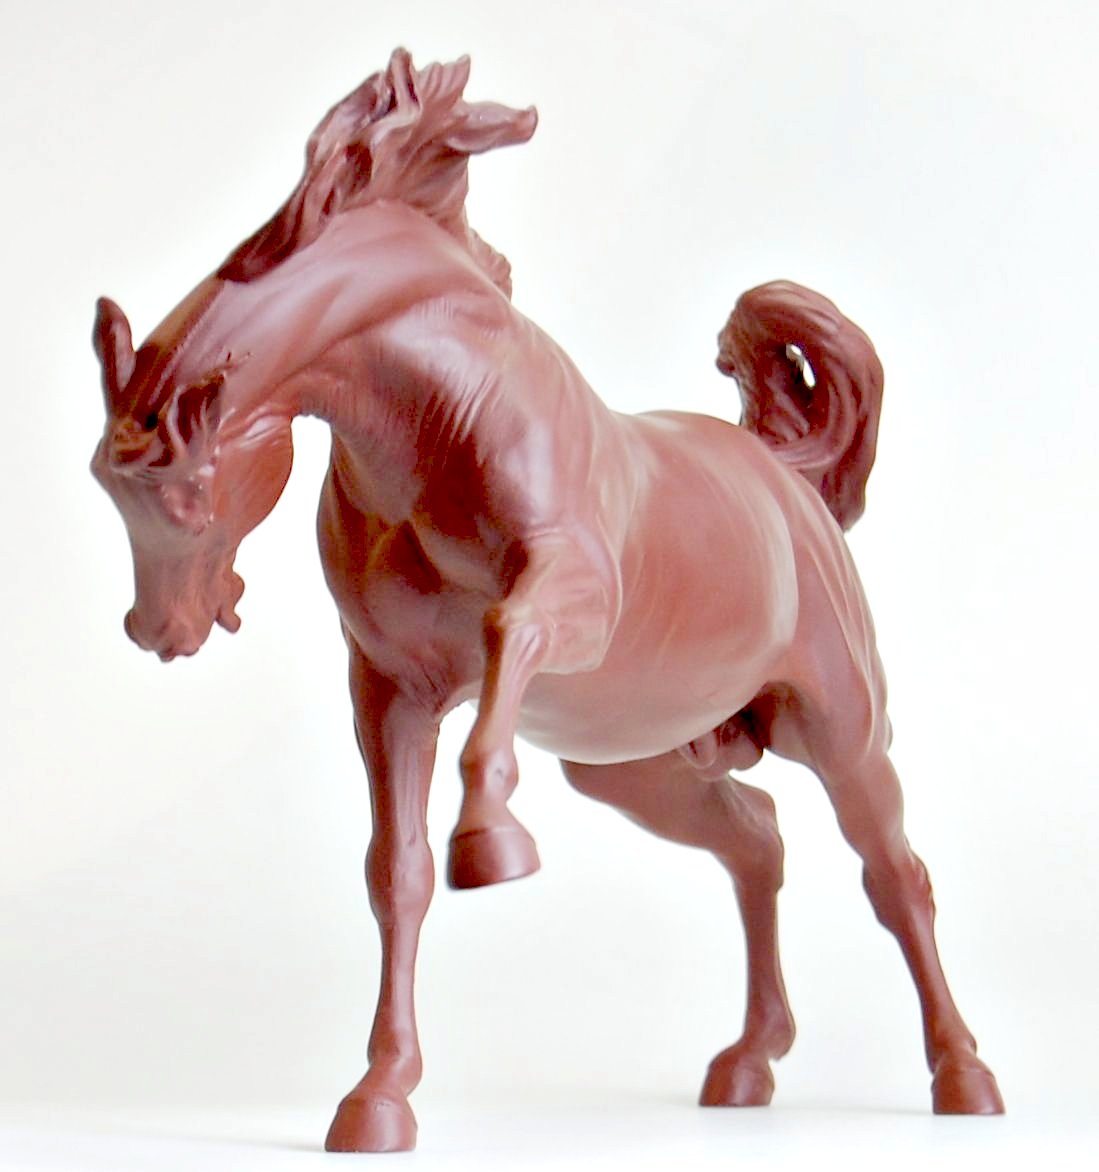
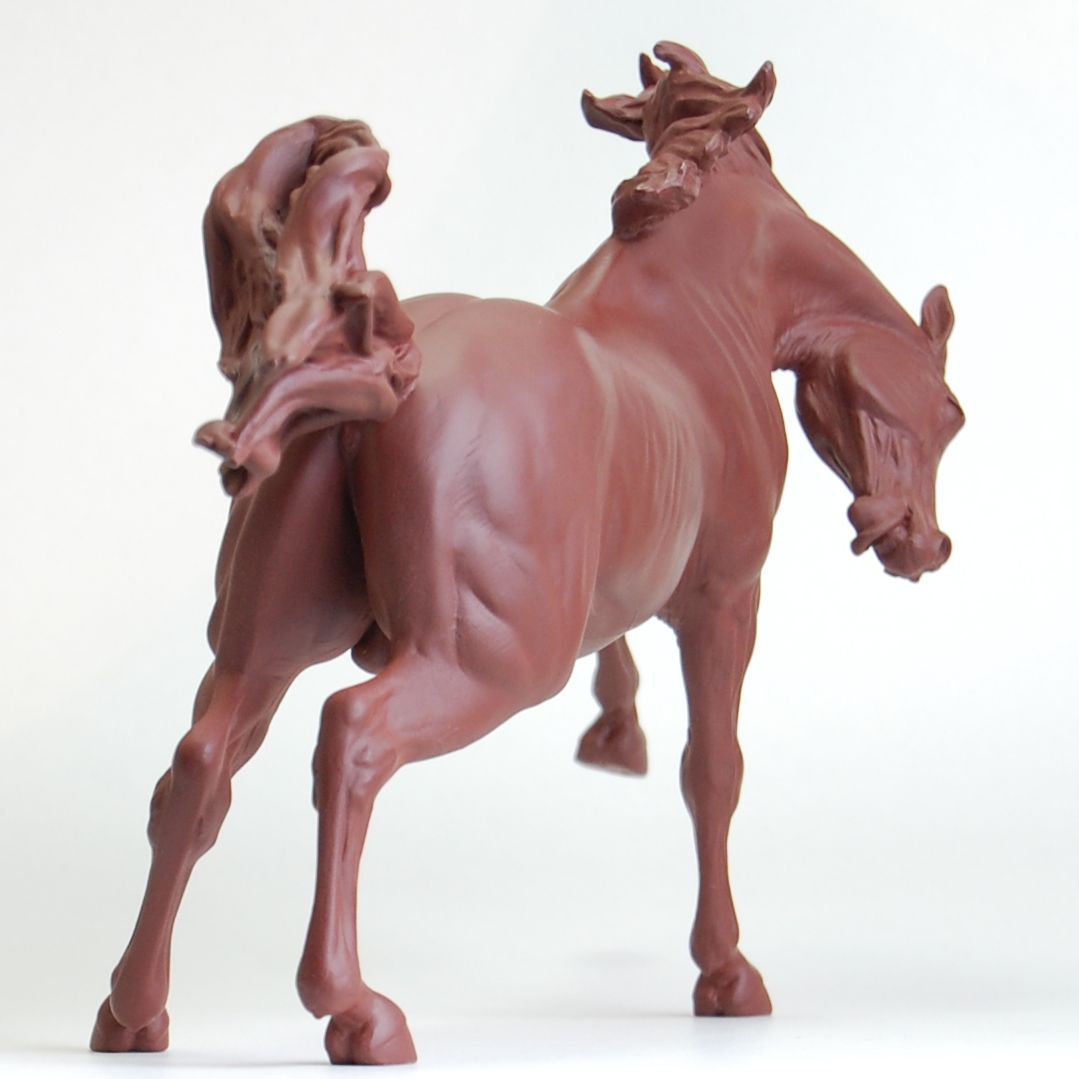
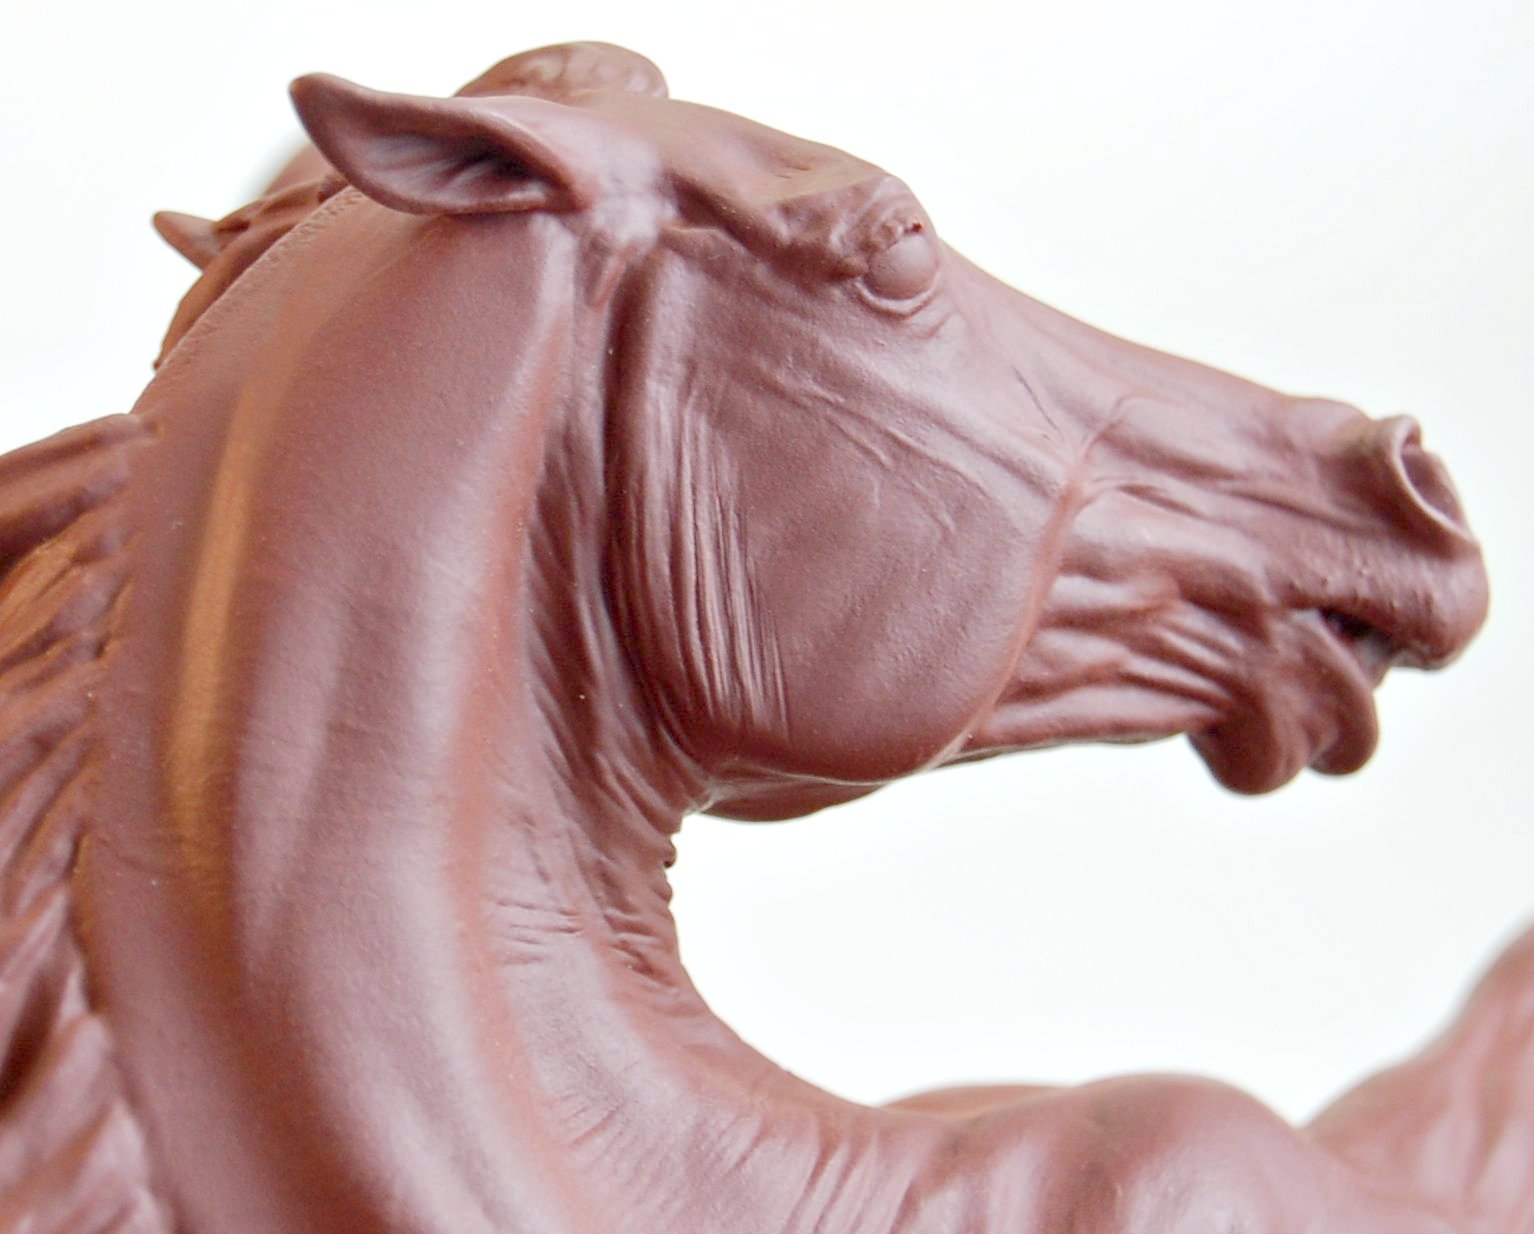
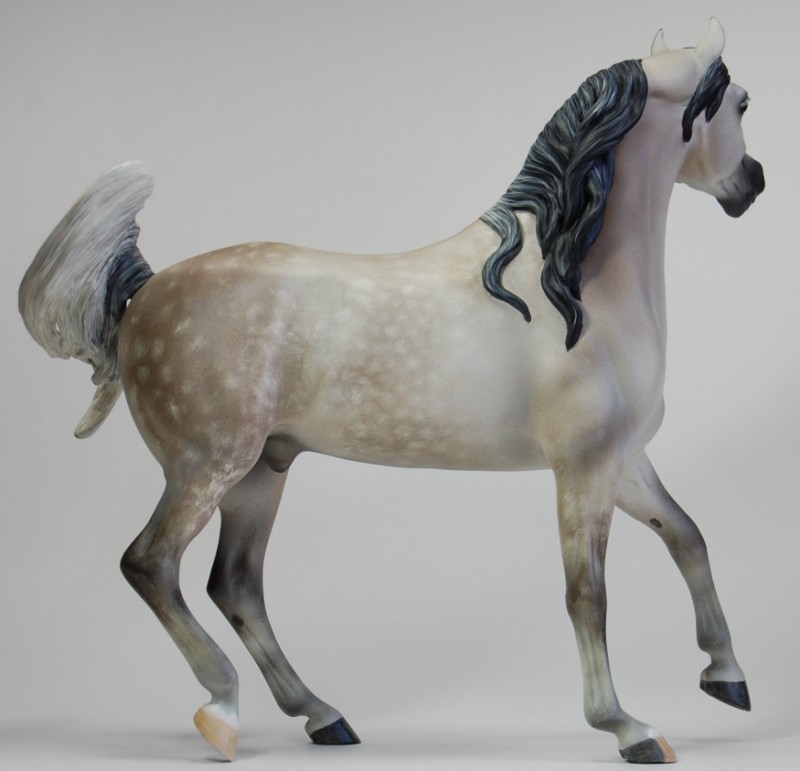
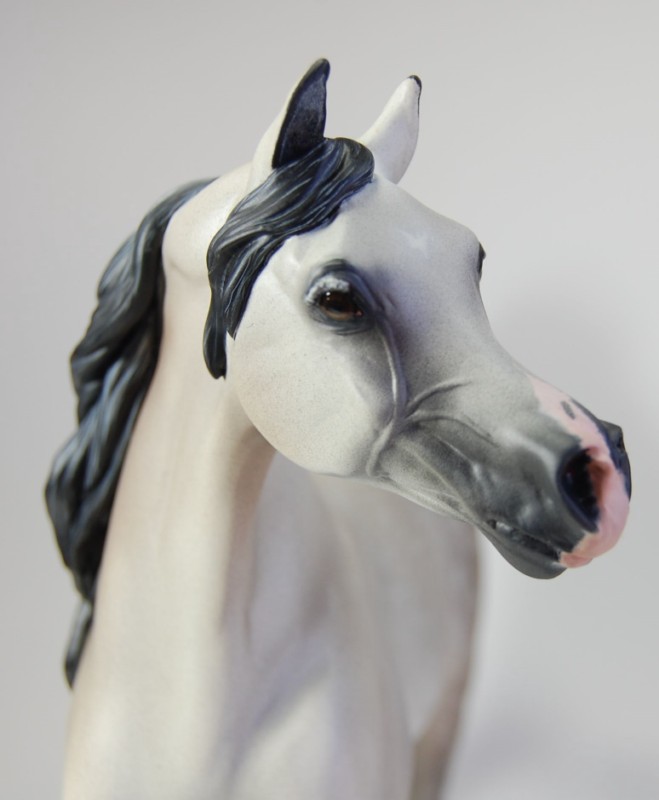
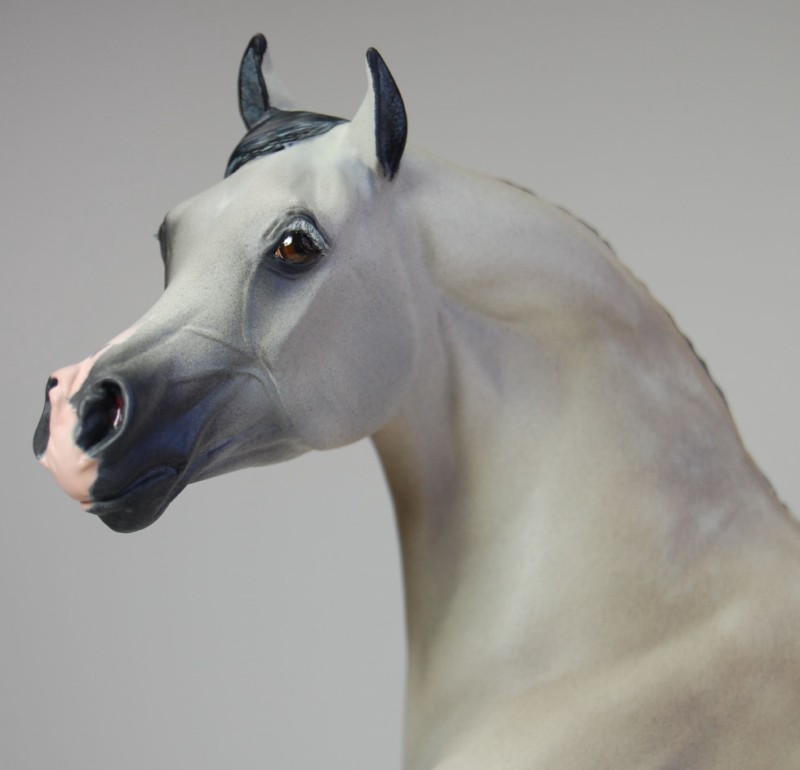
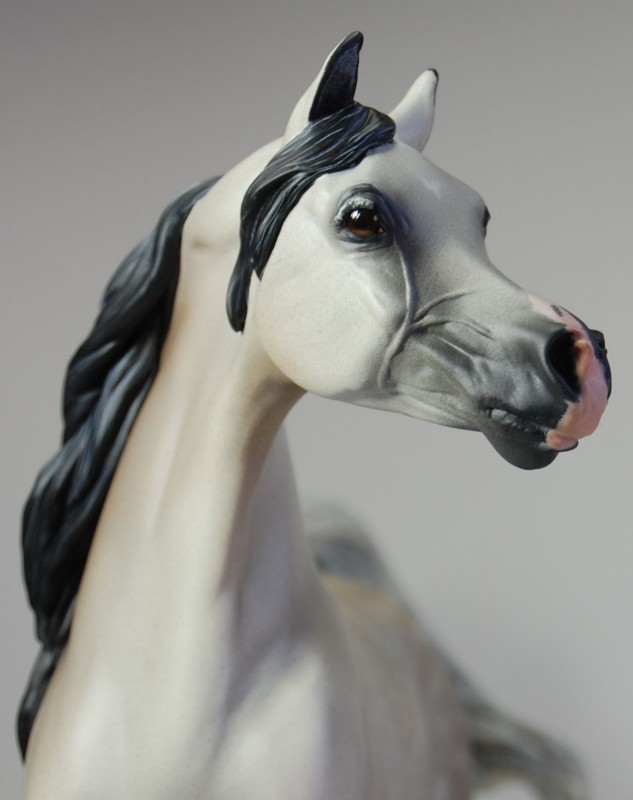
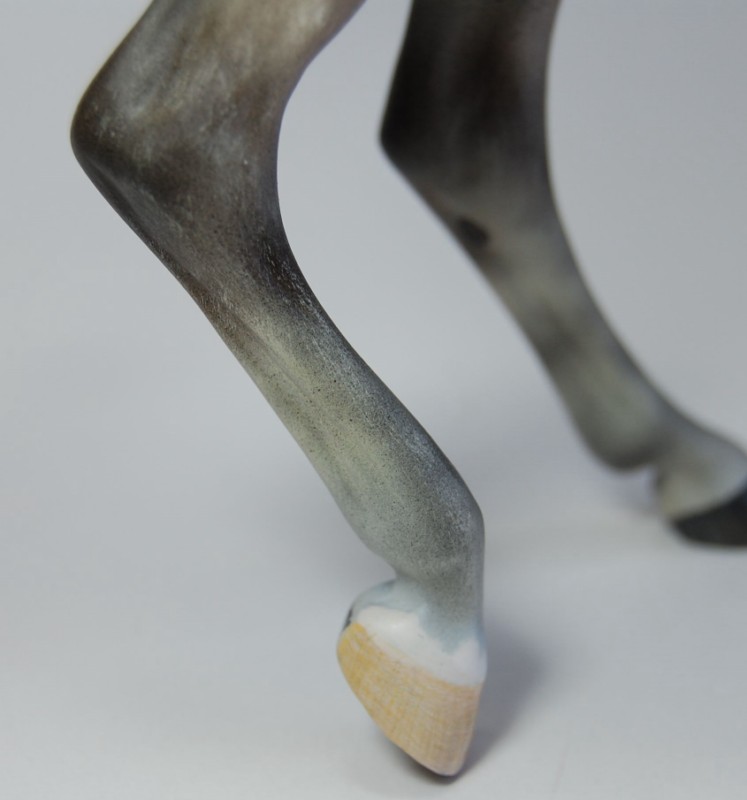
Khonsu is a customized Breyer "Sham". Every inch of this sculpture has been resculpted by me, Maggie Bennett, leaving him entirely new--a true drastic custom. While he still maintains Sham's original pose, I have corrected flaws such as Sham's wildly differing leg lengths and odd proportions. I've also made him into a gelding, which I felt better fit his feel.
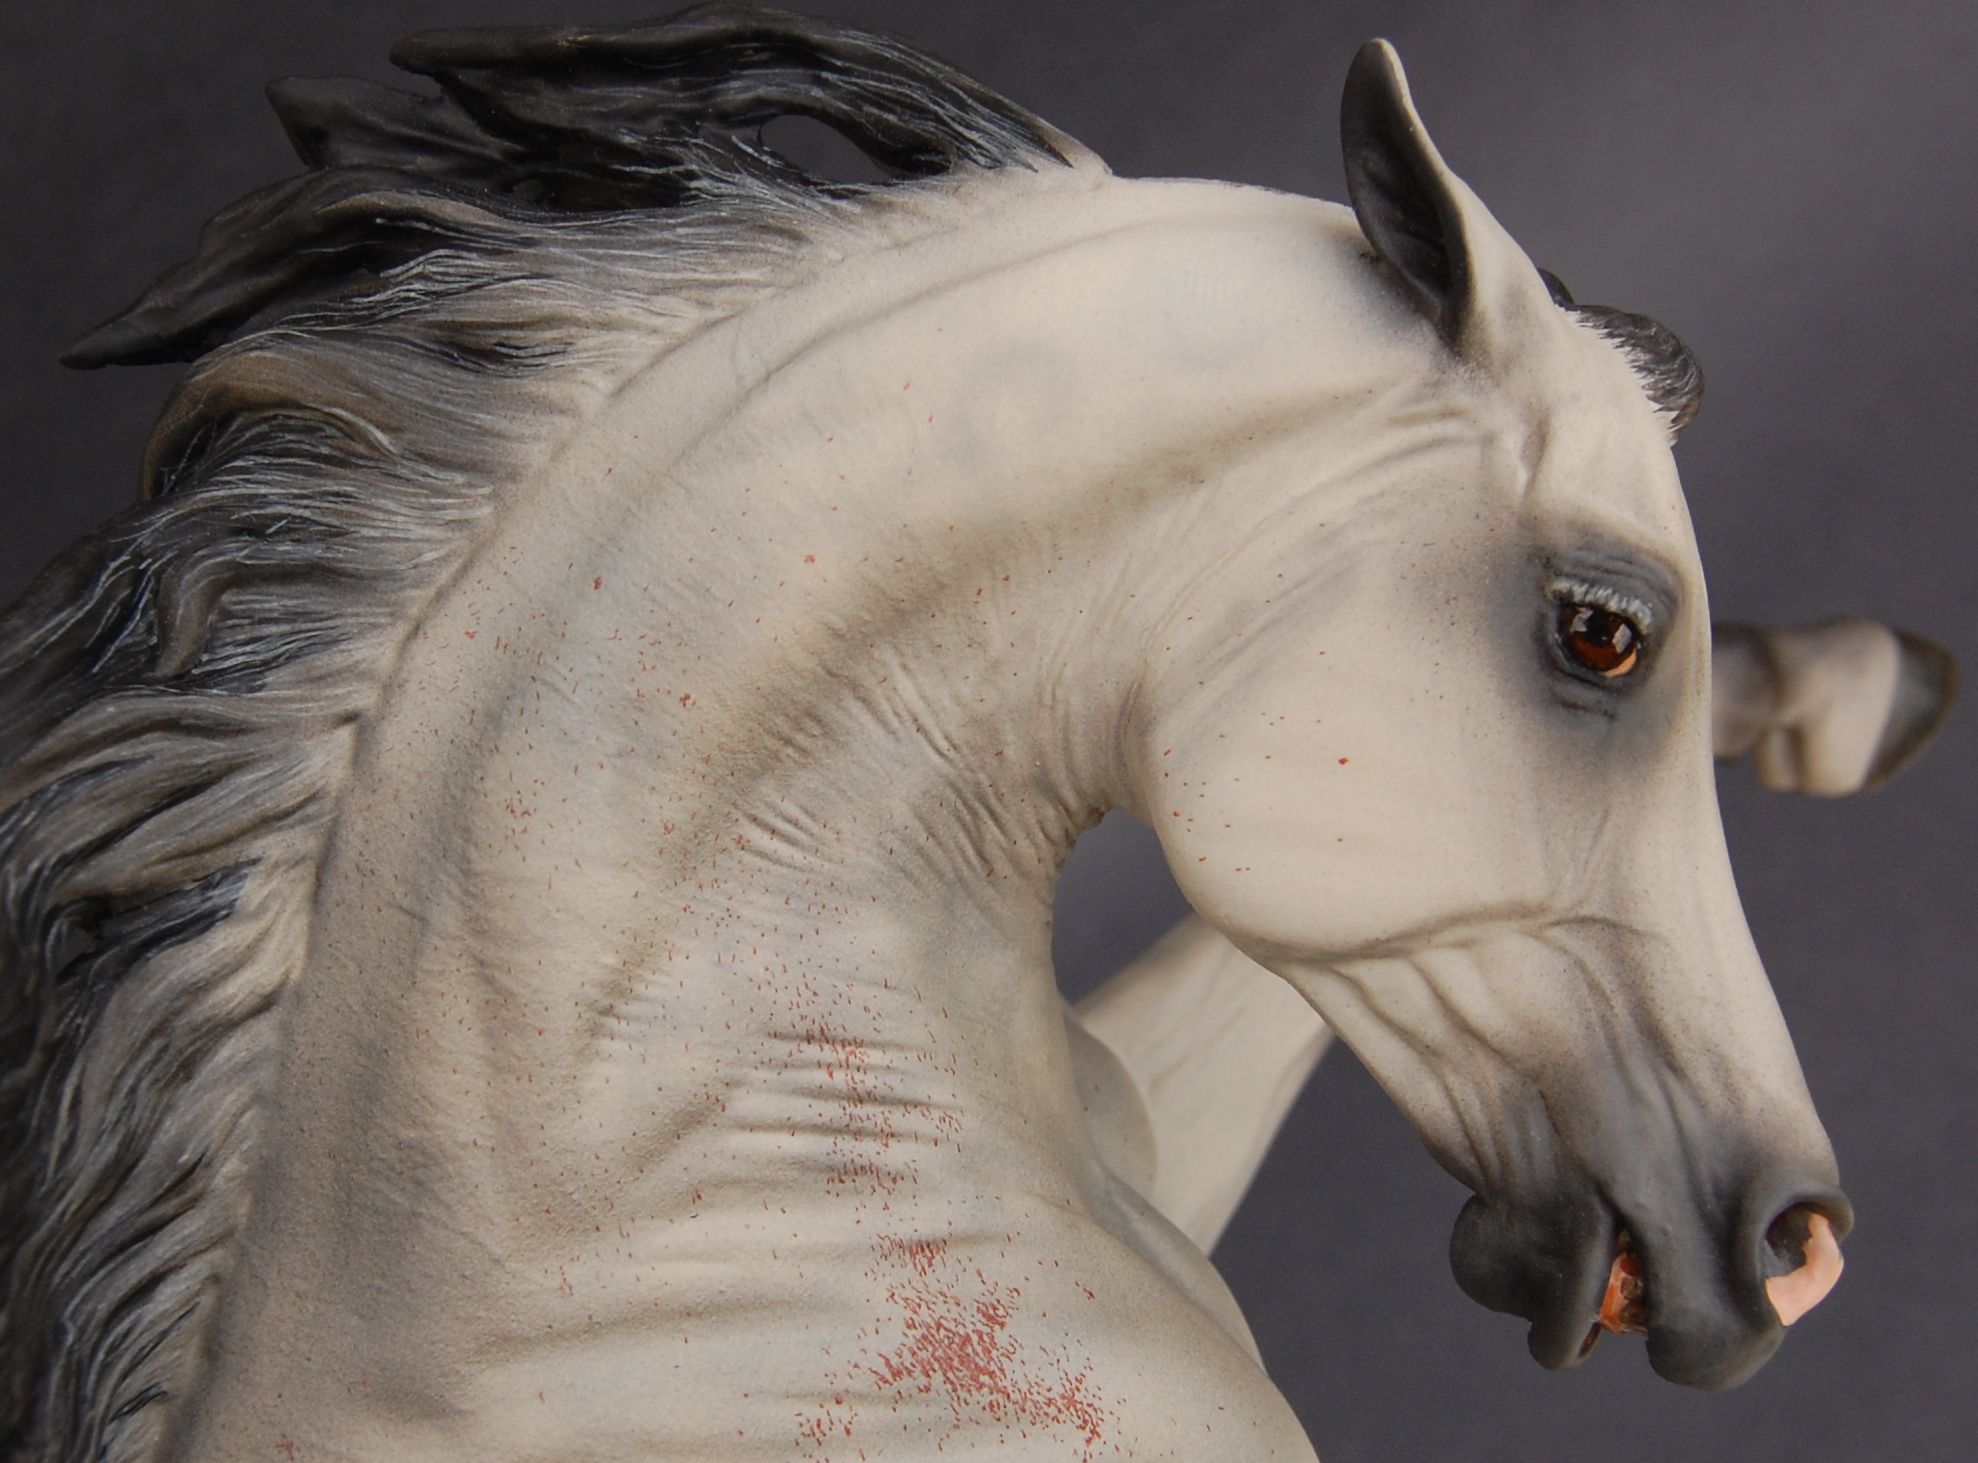
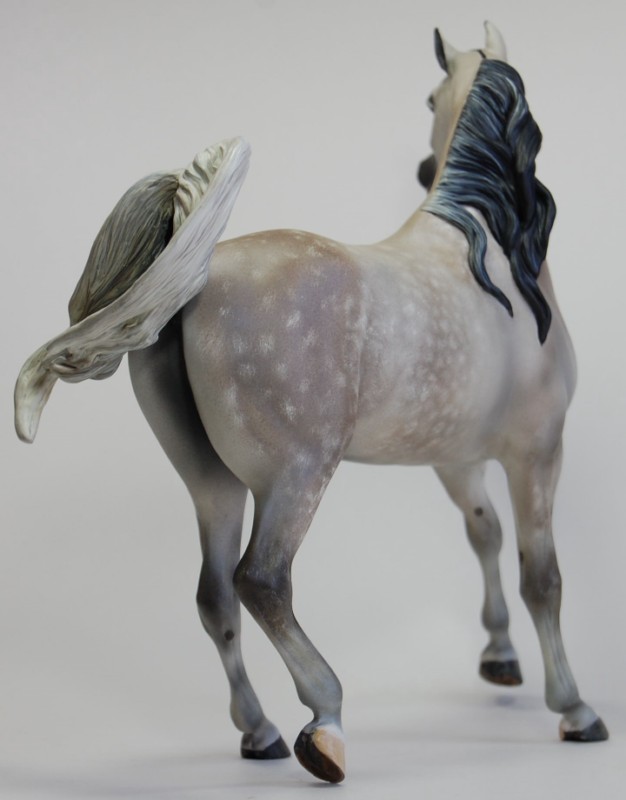
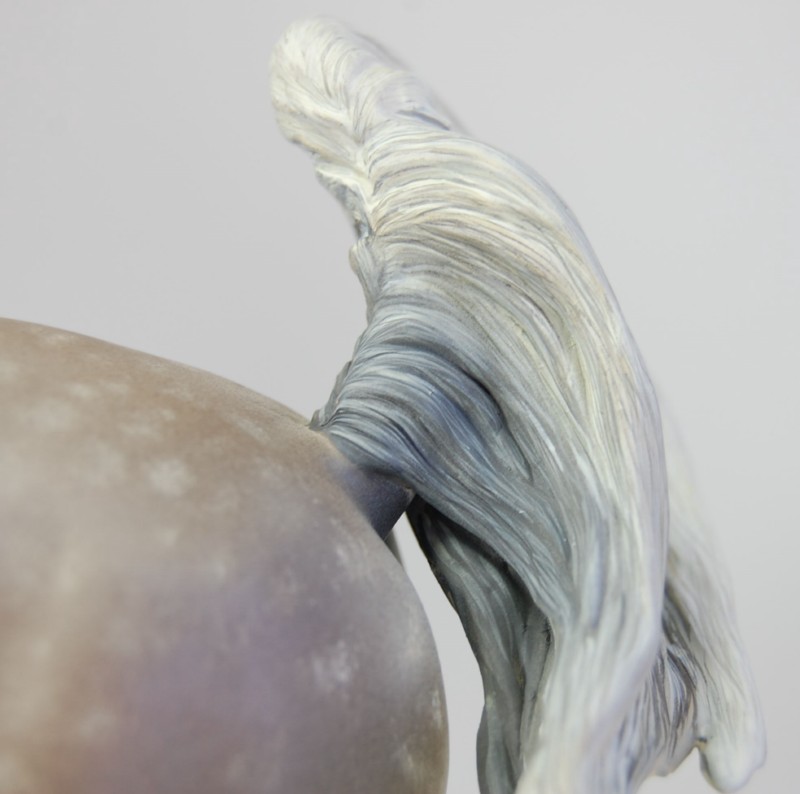
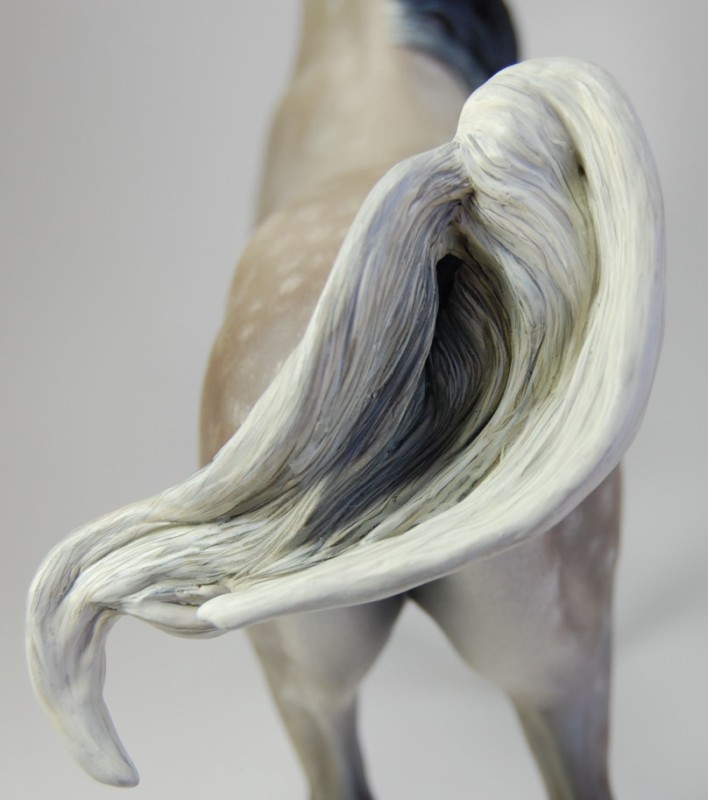
After completing the sculpture I have finished him to a softly dappled rose grey (bay gone grey). He is delicately detailed all over with his dapples following hair patterns. Also note his detailed mane and tail, showing the long lines of individual hairs. His finishwork includes acrylics (airbrushed and handpainted), archival ink, and colored pencil. He has been thoroughly sealed for durability.
Since he is a customized Breyer he is eligible to show at Breyer-only shows such BreyerFest Live. I would consider him LSQ (live show quality), but he has not been shown.
I have included many pictures of him; click on any of them to view them larger. If you'd like more pictures just contact me!
![]()
![]()
![]()
![]()
![]()
![]()
![]()
![]()
![]()
![]()
![]()
![]()
![]()
![]()
![]()
![]()
![]()
![]()
![]()
![]()
![]()
Introducing "Khonsu"
Khonsu is a customized Breyer "Sham". Every inch of this sculpture has been resculpted by me, Maggie Bennett, leaving him entirely new--a true drastic custom. While he still maintains Sham's original pose, I have corrected flaws such as Sham's wildly differing leg lengths and odd proportions. I've also made him into a gelding, which I felt better fit his feel.
After completing the sculpture I have finished him to a softly dappled rose grey (bay gone grey). He is delicately detailed all over with his dapples following hair patterns. Also note his detailed mane and tail, showing the long lines of individual hairs. His finishwork includes acrylics (airbrushed and handpainted), archival ink, and colored pencil. He has been thoroughly sealed for durability.
Since he is a customized Breyer he is eligible to show at Breyer-only shows such BreyerFest Live. I would consider him LSQ (live show quality), but he has not been shown.
I have included many pictures of him; click on any of them to view them larger. If you'd like more pictures just contact me!


Subscribe to:
Posts (Atom)

