
All the tools, including the important fingers:

This includes everything that I use frequently, except sandpaper. I have a few other tools that I use rarely, but with just these I can do everything I need to!
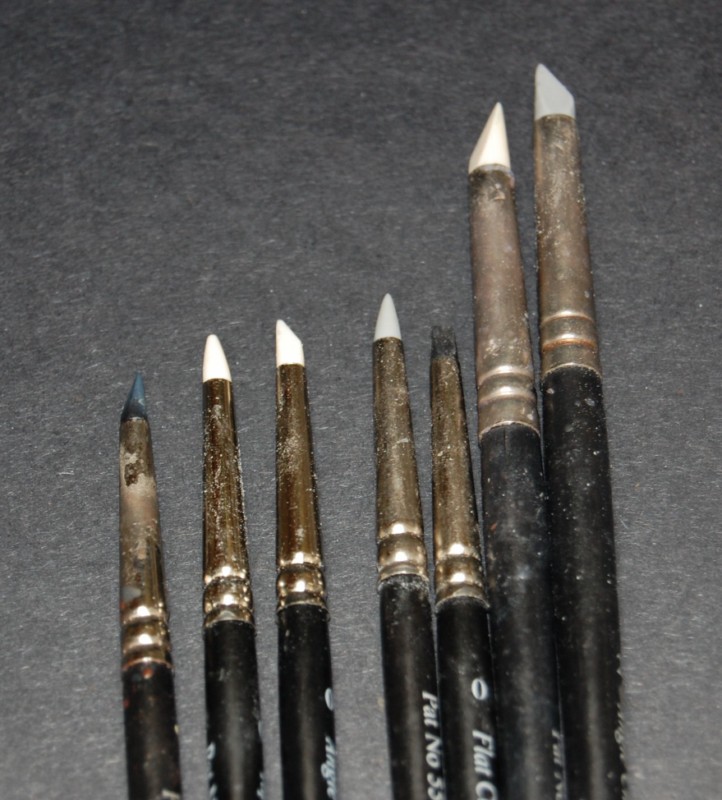
Above are Colour Shapers and Clay Shapers. These are the small ones--I have larger ones that I use on larger sculptures too! These little guys are invaluable. They come in several hardnesses (the white ones are softest while the black ones are hardest) and a number of different shapes. I prefer the Angle Chisels and Taper Points--most of the ones I have are Angle Chisels.
I generally prefer to pick all my tools out in person, but I feel that the clay shapers are a case where this is especially helpful. I went to pick up new ones last week (they do wear out, either from allowing clay to harden on them or from the rubber naturally hardening--they start to develop small cracks and rough spots). I was able to select an especially blunt example of the cone-shaped Taper Point size 0, second from the let above. It's perfect for defining large areas of muscle without leaving a hard line between them--just what I needed! The black Angle Chisel, also in size 0, on the far left I selected specifically for it's very fine point--great for sculpting small details, and on micro minis those small details are small!
Clay Shapers are some of my favorite tools. The rubber tips give a softer line than metal tools, and allow you to move material around in a different way. But they aren't the most pointy things out there, for that you need...
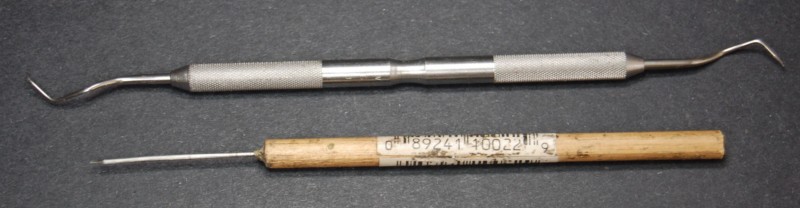
Pointy tools! This is a needle tool and a dental tool. Needle tools like this one can be found at most craft stores. I'd suggest several--keep the points straight on some and bend others a bit. Or go for the dental tools, found in this case at the flea market! I use these mostly, but not exclusively, for working in soft material--epoxy before it has cured. What about after it's cured?

Well, then you need...tools for working in hard stuff! They include carbide scrapers (the full set from Rio Rondo comes with a couple more tips that I seem to be missing), needle files, and an exacto-type craft knife. I also have a small saw that is currently rather broken. With these tools I can carve, slice, file, and generally rearrange hardened material (mostly by removing it). A good stock of blades for the exacto knife is a good idea--don't bother fighting with dull blades when you can buy fresh ones by the hundred from places like Micro-Mark.
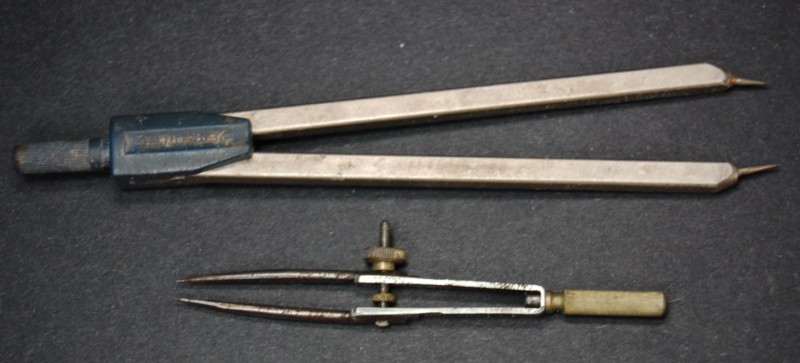
These two tools are very important: calipers! Actually, I believe both of these would be considered dividers, but they work the same. The one on top I got from an office supply store some years ago. It adjusts easily, and gets big enough to be used for more larger horses as well as the little guys. The small one I just got recently, though it's probably older than any of the other tools here--another flea market find. I don't know if this is its intended use, but it works! You need some form of dividers to check measurements--things like making sure both sides are symmetrical.
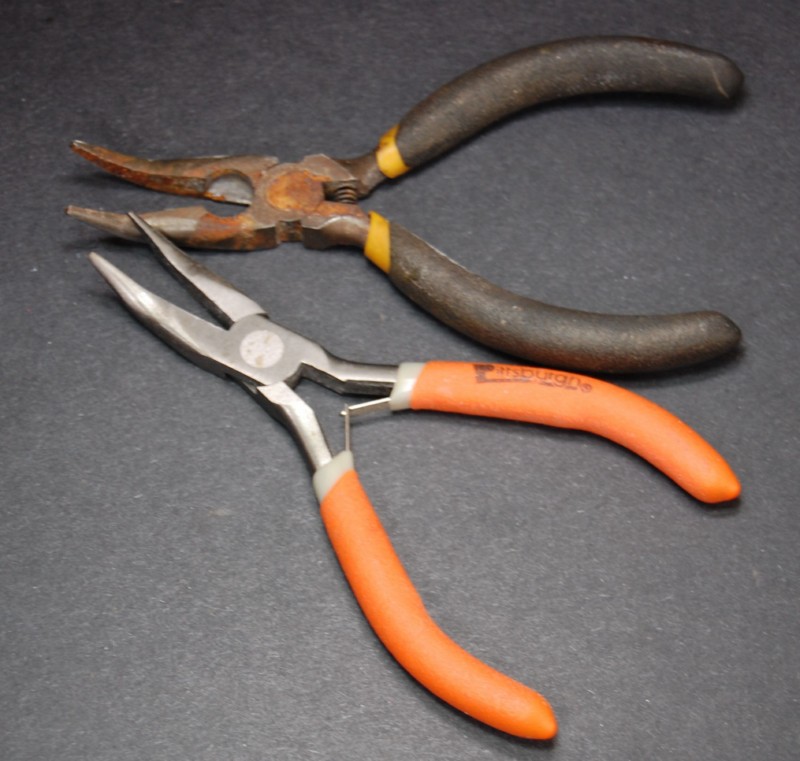
Needlenose pliers. I have several pairs, in varying degrees of repair. The black-handled ones are rusty but have wire cutters, the orange-handled ones have smooth jaws. Both are very useful for bending wire, creating and positioning armatures, and even for removing cured epoxy (by crushing it).

Last, but not least, is a good light source. I have two of these little lamps, picked up from IKEA for a song some years ago. They have a bright bulb (halogen, maybe?) and put off rather a lot of heat for their size. This is actually a good thing! I use one light for my light source when sculpting, and the other I use as a heat source to speed the curing of epoxy. I can fully cure epoxy in about 15 minutes instead of 3+ hours, which means far less time spent sitting around waiting.
For sculpting, I prefer a light source that is nearer to being a "point" source, rather than a diffuse source like a fluorescent bulb. I do prefer fluorescents and other diffuse light when painting, but the hard, sharp light from a point source makes it easier to see the detail of a sculpture for me. Lots of light is very important to small-scale sculpting--the more light you have, the better your eyes can focus, and the better you can see--and seeing is half the battle! It's a physics thing: the smaller the aperture, the sharper the focus.
Note that I don't use any sort of magnifying devices. I've tried those nifty headband-type magnifiers and just had too many problems with depth perception and with holding the sculpture in just the right place so it remained in focus. I know they work for lots of other people, jut not for me!
I won't say that any one of these tools is a magic bullet, or even that anyone needs any of them. They're just what work for me right now! Different people use different tools, and differences in sculpting style may translate into different preferences in tools.

