This is going to be a quick one as I'm actually with my family now, but--
When packaging a model to mail, I think one of the most important things is to make sure there is enough packing material to fill the box. I use packing peanuts (I bought 120 cubic feet of them at once, that's a LOT of packing peanuts) and bubble wrap over toilet paper. I wrap ears and other protruding parts with the tissue. I wrap around the dock, for instance, in a way that will provide support rather than adding to the stress on the piece. Then a good layer of bubble wrap, then into a box big enough to have at least 2-3" of room all the way around the bubble wrapped horse. More space is better, but you don't want the box to be so big that you need a fortune in packing peanuts to fill it.
I put a good 2" or more of peanuts in the box, then put in the bubble wrapped horse, then fill the box with peanuts, tucking them in around the sides of the horse. When you close the box, before taping the top pick it up and shake it gently. If there is any shifting at all, you need more peanuts. Shifting is a danger sign--it means you model will be able to work its way to the edge of the box and get broken. So use lots of packing material so there is no danger of shifting. I tend to fill the box to slightly over the edge, then gently push the peanuts down when I close the box. You don't want there to be so much pressure on the horse that it is in danger of breaking, but you don't want it to move around either!
Wednesday, December 22, 2010
Monday, December 20, 2010
Microfiber Towels
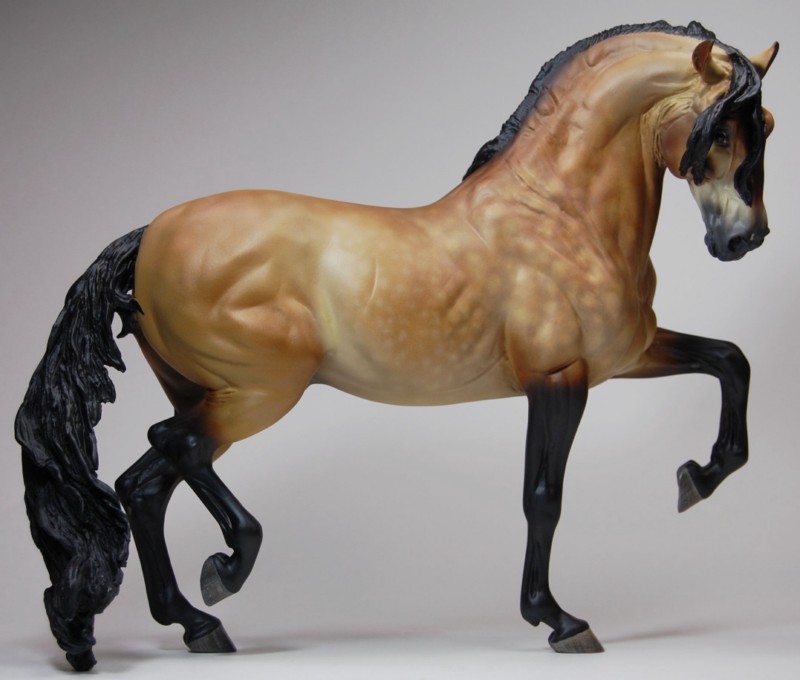
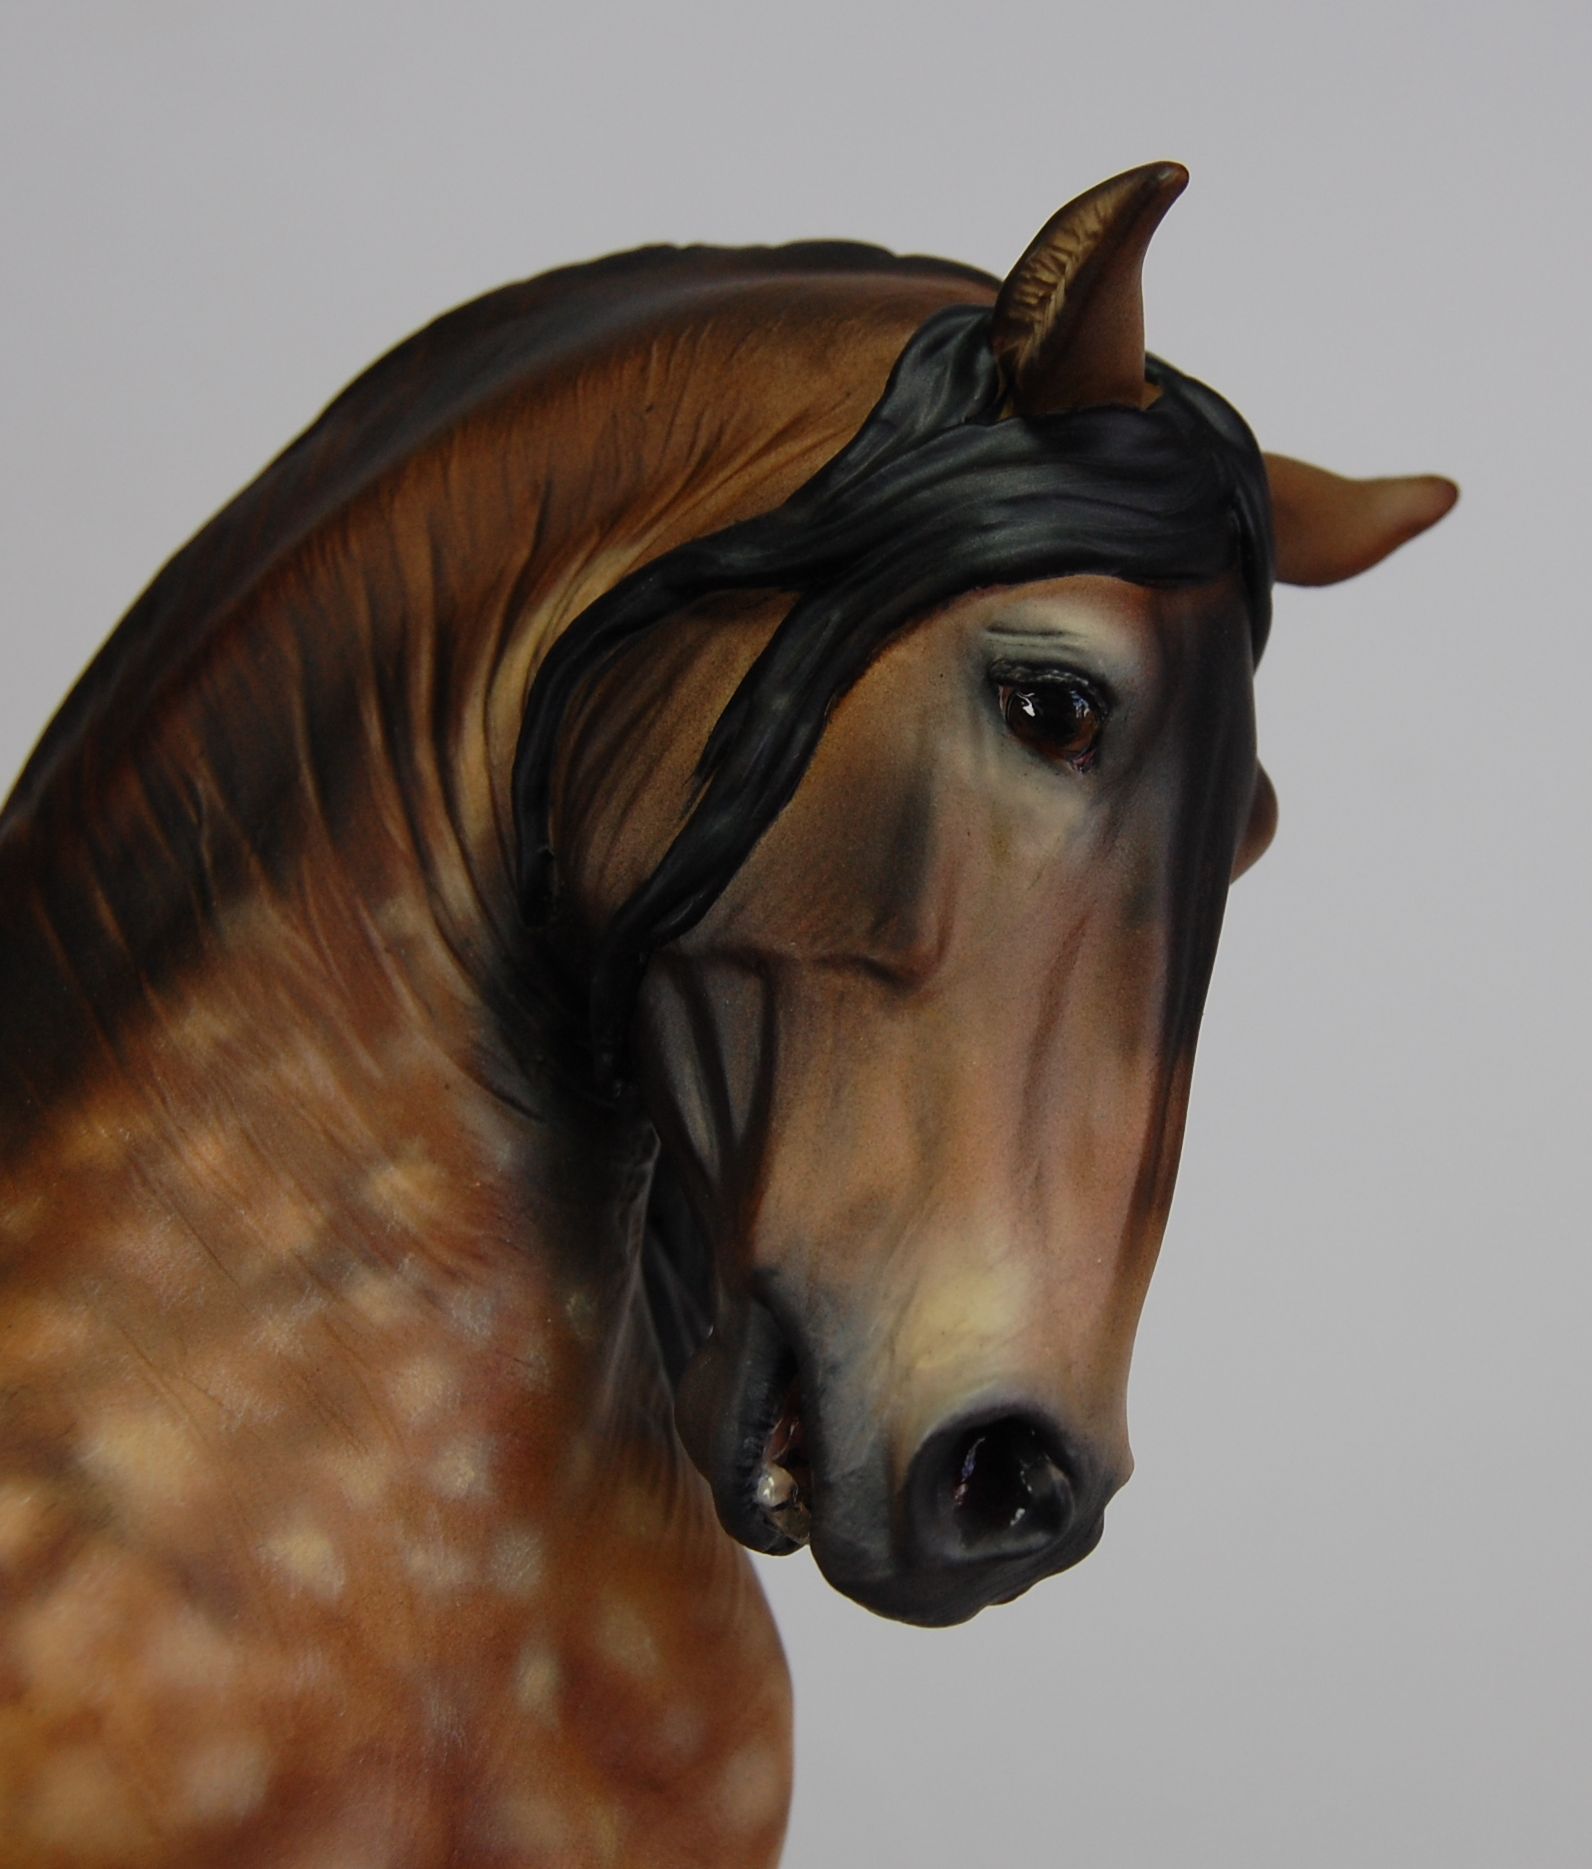
Above: "Almanzor" resin, sculpted by Brigitte Eberl, finished by me. Private collection.
Continuing on the subject of useful things in the studio, I love microfiber towels. I get a big bag of the yellow ones from Costco every so often as they're useful in the studio as well as around the house. Mine generally start off being used to gently dust horses. My studio tends to be more than a little dusty, and that can be a problem when painting. I carefully remove dust and fuzzies from each horse using a microfiber towel before spraying the horse with Dull Cote.
The microfiber holds dust and dirt in, so it's not as likely to just spread the dust around as other towels will. And it's nice and soft, so it doesn't tend to scratch that delicate finishwork before sealing.
When I need to lay horses down, I'll often put down a microfiber towel to protect them from hard surfaces. I'm currently painting a group of 60 small-scale horses (larger than micro mini, smaller than stablemate), and I have found it useful to lay half of them down on a towel on a tray, lay another towel over them, and then lay the other half on top. Saves me a few trips up and down the stairs to spray all these little horses!
I also wrap horses in towels when transporting them to shows. It protects the paint and adds just a little bit of cushioning. And, if I happen to spill something either at a show or in the studio, I always have a towel handy! They're washable, though I try to wash all microfiber together to stop it picking up lint from other fabrics.
Friday, December 17, 2010
Apoxie Sculpt and Rubbing Alcohol
I mentioned mixing Apoxie Sculpt (AS) and rubbing alcohol yesterday. This is a technique that I use at the very end of finishing a piece to add texture and veining. It's a bit difficult to convince AS to mix smoothly with a liquid, so this takes a bit of patience. I know Aves makes other variants on AS and one of them may be a liquid or paste that would work well for this, but I just use AS. I'm going to call my mixture a paste, though it's often more of a thick liquid.
I mix up a small batch of AS as usual. I then put it in one of my handy lids, ideally a fairly large one with decent sides. I then add some denatured alcohol, with the amount depending on how thick I want my paste and how much AS I have. Better to start with a bit less and add more later, but it does evaporate fairly quickly. Then comes the hard part: I use my gloved fingers to mash the AS into the alcohol. It takes a lot of mashing and squishing and rubbing, and it's important to get it as smooth as possible. Any lumps will be quite annoying when you go to use the paste.
The paste needs to be used immediately. It will dry out and the AS will begin curing, so I make sure I have a good hour or two set aside to use it before I begin making it.
I brush the paste on to areas where I want fine wrinkles, use it to paint on delicate veins, texture hair with it--anything that needs a very delicate bit of texture. I use brushes set aside specifically for this. Even though the AS paste does wash out I don't want to destroy my good brushes with it.
You can further smooth the mixture using additional alcohol, just as you can smooth any AS with alcohol. It will get grainy if overworked, and if that happens sometimes it's best to just wipe it off and start over.
Since this technique is for the surface detailing, make sure that everything else is finished before you do it--it should be the very last step before priming and painting.
Thursday, December 16, 2010
Recycling

In my last post I showed a horse standing on a lid. Here he is again--his little legs are pretty rough still!
I save most of the lids that come on food containers here, run them through the dishwasher, and use them in the studio. There are lots of potential uses: a palette for small amounts of paint, a mixing tray for squashing together Apoxie Sculpt and rubbing alcohol to make a paste, bases for horses like Cooper who need something to stand on while being painted, and temporary holders for small sculptures like this one. I'll also put a bit of baking soda in one so it's easier to dip parts into when doing the soda-glue method with super glue. When they get dirty it's easy to just toss them, since it's what would have happened to them anyhow!
Wednesday, December 15, 2010
Sculpting Lights
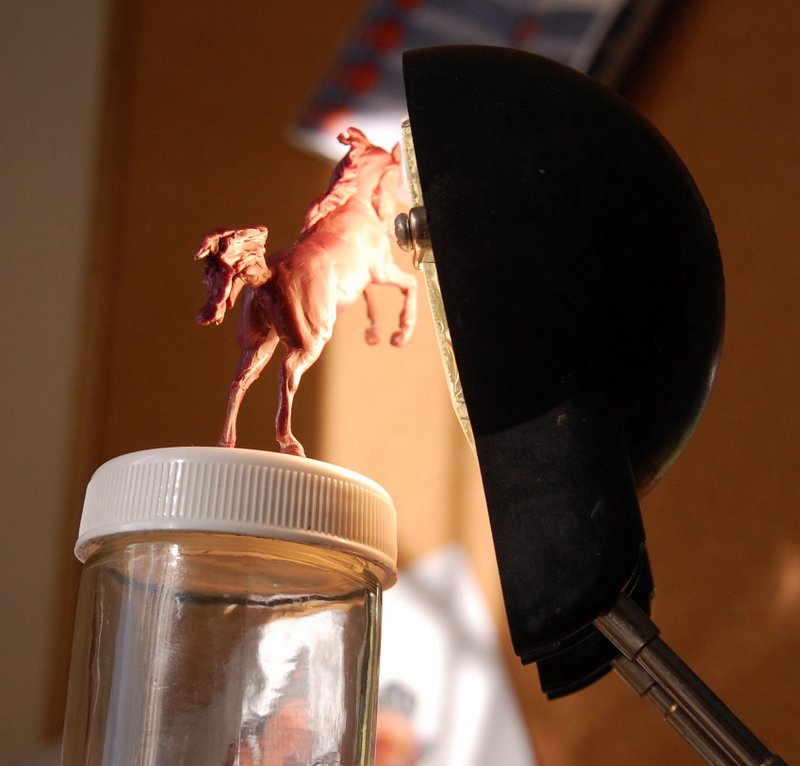
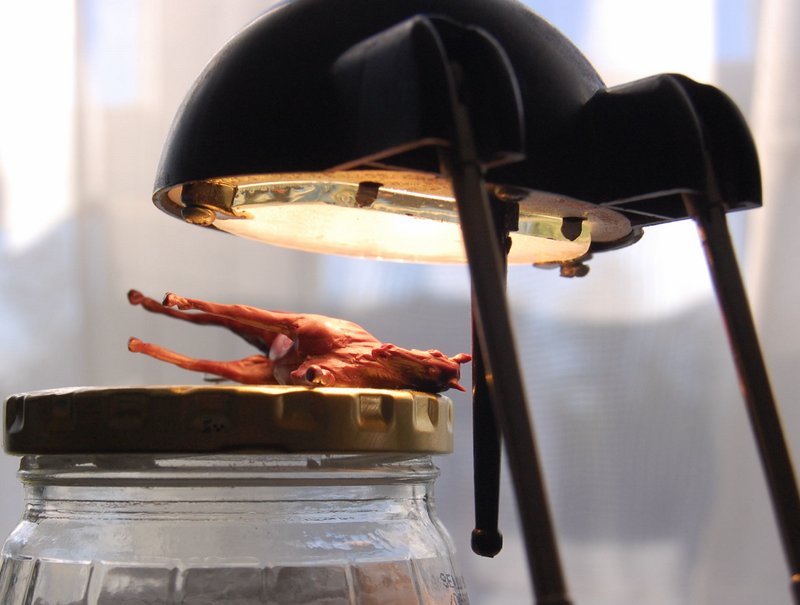
In this case both the horses I am sculpting on today are under the lamps right now. The Arab on top has his leg wires jammed through a pair of holes in a lid (which doesn't actually quite fit that jar) so he can stand until I make him a base. Note that this lamp is missing the plastic rod that the other one has--that's actually nice, as it means I can position the lamp in more ways. The PRE sculpture below him is laid down so I don't knock him over again!
These lights can get quite hot so it's important not to get them too close to the sculpture. It's especially important when working on customs as the plastic will melt or deform at a much lower temperature than Apoxy Sculpt can stand. I will put my lights as close as 1/2" for small sculptures like these but no closer than about 1 1/2" for a custom. It is possible to burn epoxy too, so keep an eye on things! And remember, the pieces will be quite hot after being under that light, so be careful!
Tuesday, December 14, 2010
Sanding Twigs

I just received a container of these sanding twigs (link should be to their page on Micro-Mark, a good supplier of small tools) and they are very handy! They come in an assortment of grits, color-coded by coarseness. The finer ones have four different grits on each twig. These had been recommended to me by someone--Lesli?--and I had put off getting them because sandpaper seemed cheaper.
I wish I had gotten them much earlier! They work wonderfully for removing seams on pewter horses, and I'm sure they will work just as well on resin and plastic. It's much easier to use a twig than my normal folded bit of sandpaper for getting between legs and other difficult to reach areas. If you do a lot of prepping, give them a try.
Subscribe to:
Posts (Atom)

